Crude DNA Isolation from Seeds
Overview
Teaching: 10 minutes
Exercises: 30 minutesQuestions
How to crude DNA Isolation from seeds?
Objectives
Extract PCR-only quality DNA from a large number of samples.
SAFETY INFORMATION
Before you start, look up the MSDS sheets for all the chemicals used in this protocol. Ensure you follow any recommendations/rules regarding wearing personal protective equipment, emergency procedures, and clean-up/disposal procedures. If you have any questions contact your supervisor or lab manager.
This protocol provides a quick means to extract PCR-only quality DNA from a large number of samples.
Supplies needed:
- Tweezers
- Toothpicks
- Sterile Water
- 96-well PCR micro-plate
- Heating block set to 95°C
- 0.5M Tris-HCL (pH 8.0)
- 0.25M NaOH
Protocol:
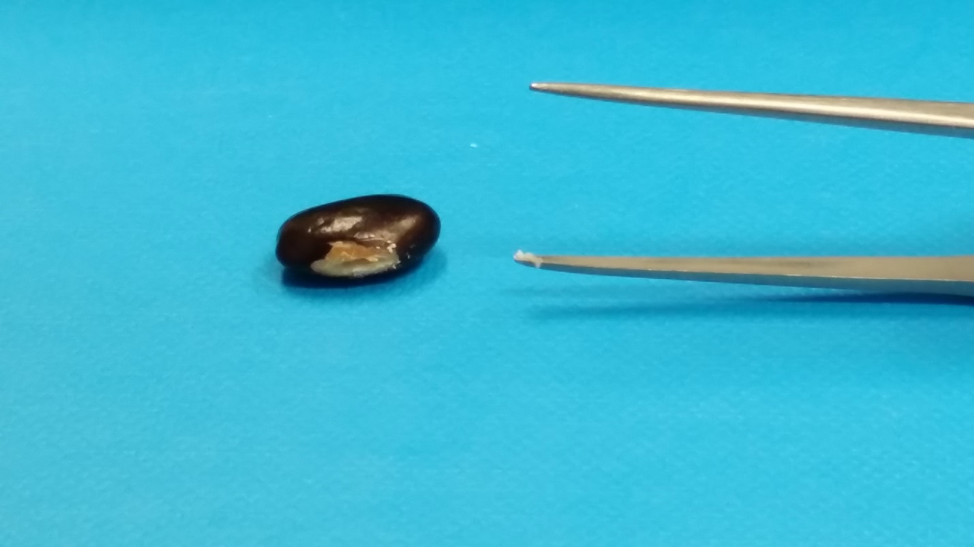
Photo of a bean with the seed coat scraped away on the front side.There is a small amount of cotyledon tissue on the tweezers to demonstrate the amount you need for extraction. Try to keep this amount consistent between samples. Ensure you only take a sample of the cotyledon and do not damage the embryo.
- Using Tweezers (or a Razor Blade or Scalpel – whichever you find easiest), chip off a small area of seed coat to expose the cotyledons.
- For beans and lentils, seed coat tissue is derived from maternal parent and does not represent genotype of the embryo. Therefore avoid contaminating sample with seed coat tissue.
- Avoid damaging the embryo when chipping the seed coat.
- Place a 96-well PCR micro-plate on ice. Add 2 µl of sterile water to each well.
- Add a small 1-2 µl drop of water to the exposed section of the cotyledon. It is typically best to line up a series of seeds at once.
- Using a clean toothpick scrape a small amount of seed flour. Transfer the collected sample into the PCR well by dipping and gently swirling the toothpick into the water at the bottom of the sample well.
- Only a small amount of flour is needed. More is NOT better.
- Be as consistent as possible with regards to the amount of tissue being collected.
- Repeat Steps 3-5 until all samples are collected.
- Once all samples are collected add 10 µl of 0.25M NaOH to each well.
- Seal samples. Shake/Vortex briefly on plate-mixer if available. Place plate on 95°C heating block for ~2 minutes. Remove and leave at room temperature.
- Carefully remove seal and add 15 µl of 0.5M Tris-HCl (pH 8.0) to each well.
- Seal the samples. Shake/vortex on plate-mixer if available. Place plate on 95°C heating block for ~2 minutes. Remove and place on ice.
- Samples can be used immediately, stored in the fridge for a few days, or frozen indefinitely.
- For regular PCR, use 1.0-2.0 µl of sample in a 15-25 µl PCR reaction. For KASP-based PCR, dilute the DNA by adding 200 µl of sterile water. Then use 2.0 µl of diluted DNA in a 8-10 µl KASP reaction.
Important Notes:
- For best results, try to be as consistent as possible with the amount of tissue collected. As with any PCR, KASP-based PCR works best when starting samples have same amounts of DNA. By being consistent, you should not have to quantify the DNA.
Key Points
Read through Safety Information before you start the experiment.
Avoid contaminating sample with seed coat tissue when handling beans and lentils.
Avoid damaging the embryo when chipping the seed coat.
Small amount of seed flour is good enough; more is not better.
Try to be as consistent as possible with the amount of tissue collected.