Creating your Lesson from the Template
Overview
Teaching: 5 min
Exercises: 3 minQuestions
What is a lesson? What is an episode?
How do I start creating a lesson?
Objectives
Create your own lesson repository.
Episodes
An episode is a cohesive block of tasks which map to a single step in your lesson. These tasks should flow well and teach a set of related concepts. For example, if you are creating a lesson on using Galaxy to extract FASTA records from a file, a great first episode would be an introduction to Galaxy. This one episode may contain many tasks such as logging in, exploring tool offerings and uploading data. All tasks within an episode should be connected by a common thread (i.e. orientation to galaxy). The estimated time it takes to teach should be less then 15 minutes, although activities completed by learners can take longer. Episodes within a lesson can be dependent on earlier episodes and are generally taught in sequence.
Lessons
A lesson is a collection of episodes that together help the learner answer a particular research question. Each lesson should include all the information needed to complete the task. While some may include tasks executed on KnowPulse, not all must as the primary goal is to answer the question completely including how to prepare data for entry into tools and how to analyze their results.
Philosophy
Our lessons are inspired by the Carpentries-style of teaching. For additional support materials on how to create good lessons, see their Hanbook for Curriculum Development and their paper Best Practices for Scientific Computing.
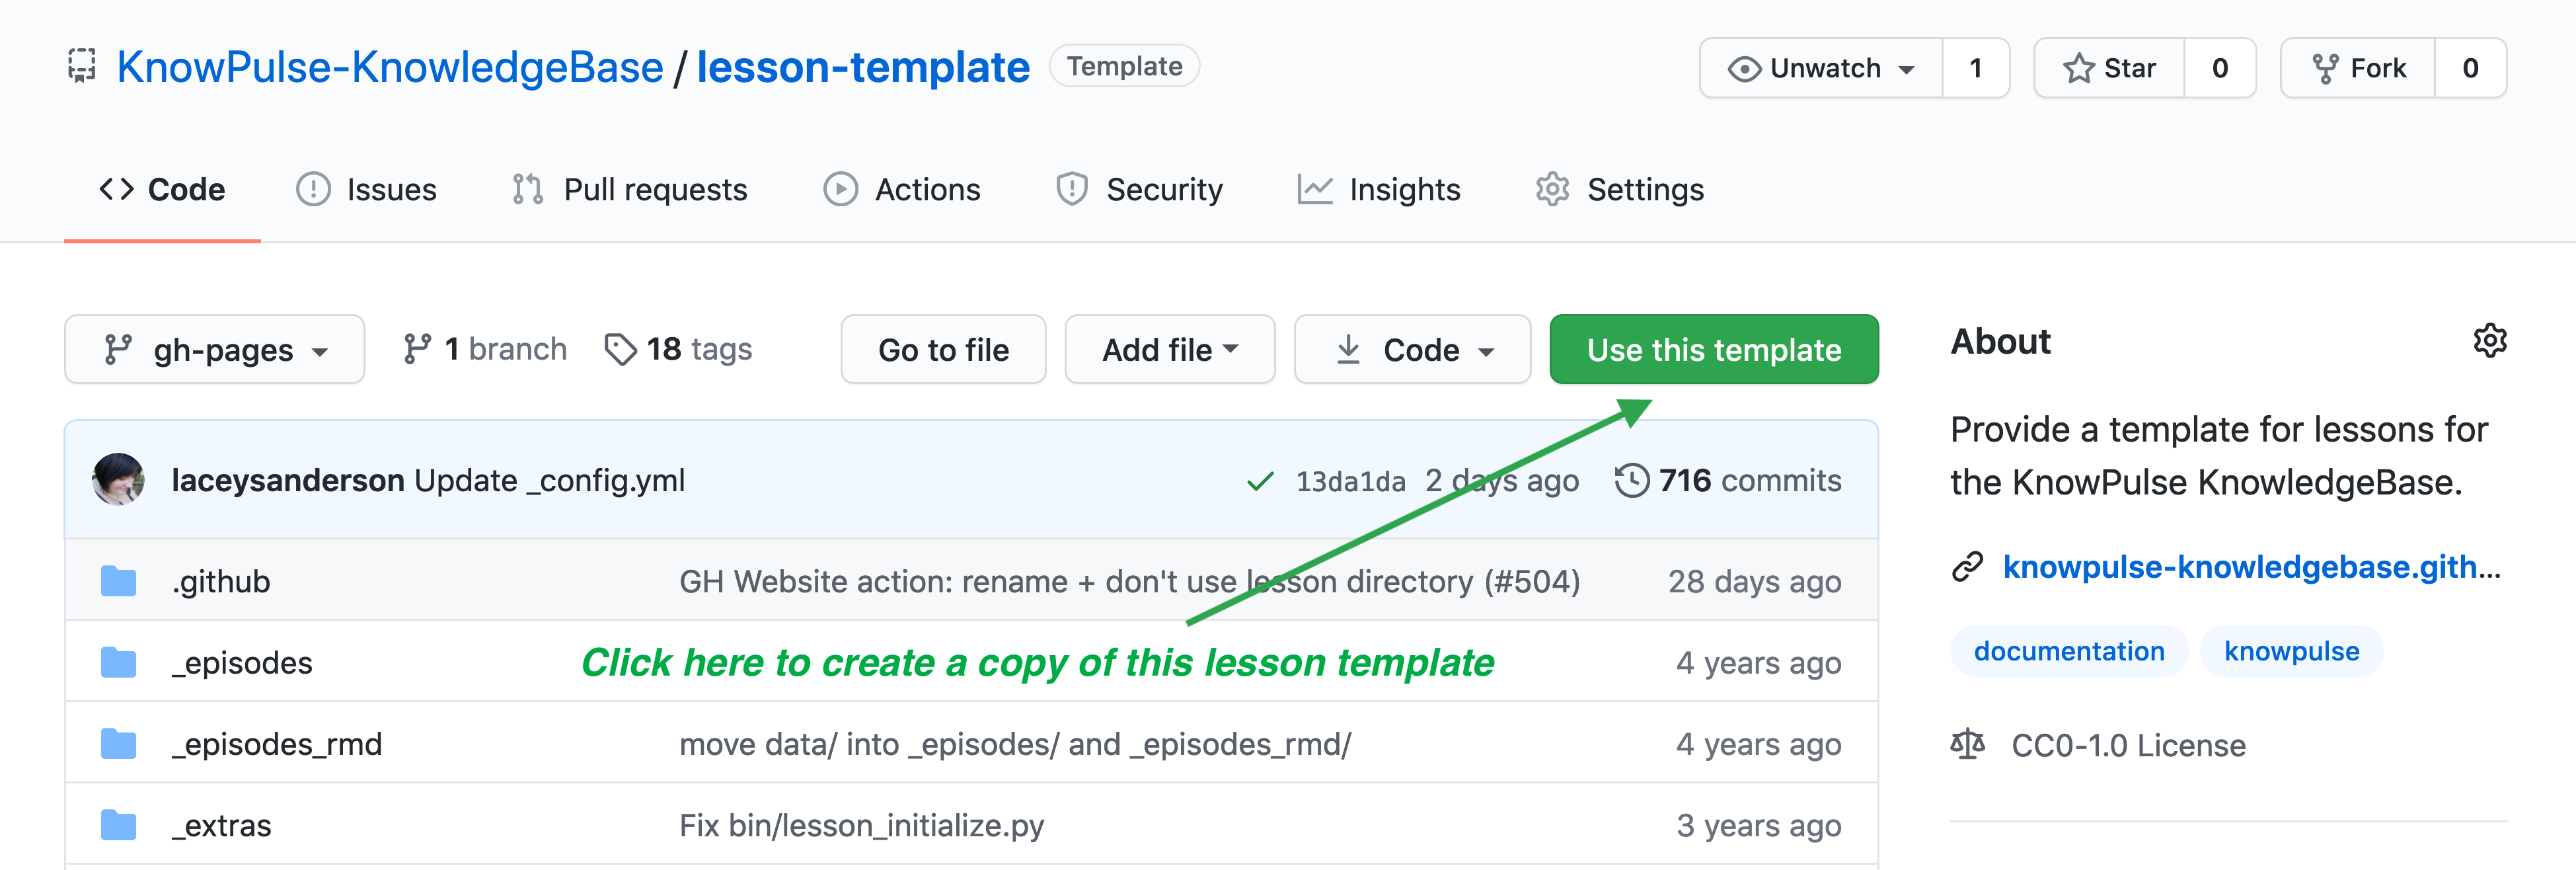
Create your own lesson repository!
Go to https://github.com/KnowPulse-KnowledgeBase/lesson-template and click on Use this template to create a copy of the lesson template in your own Github space.
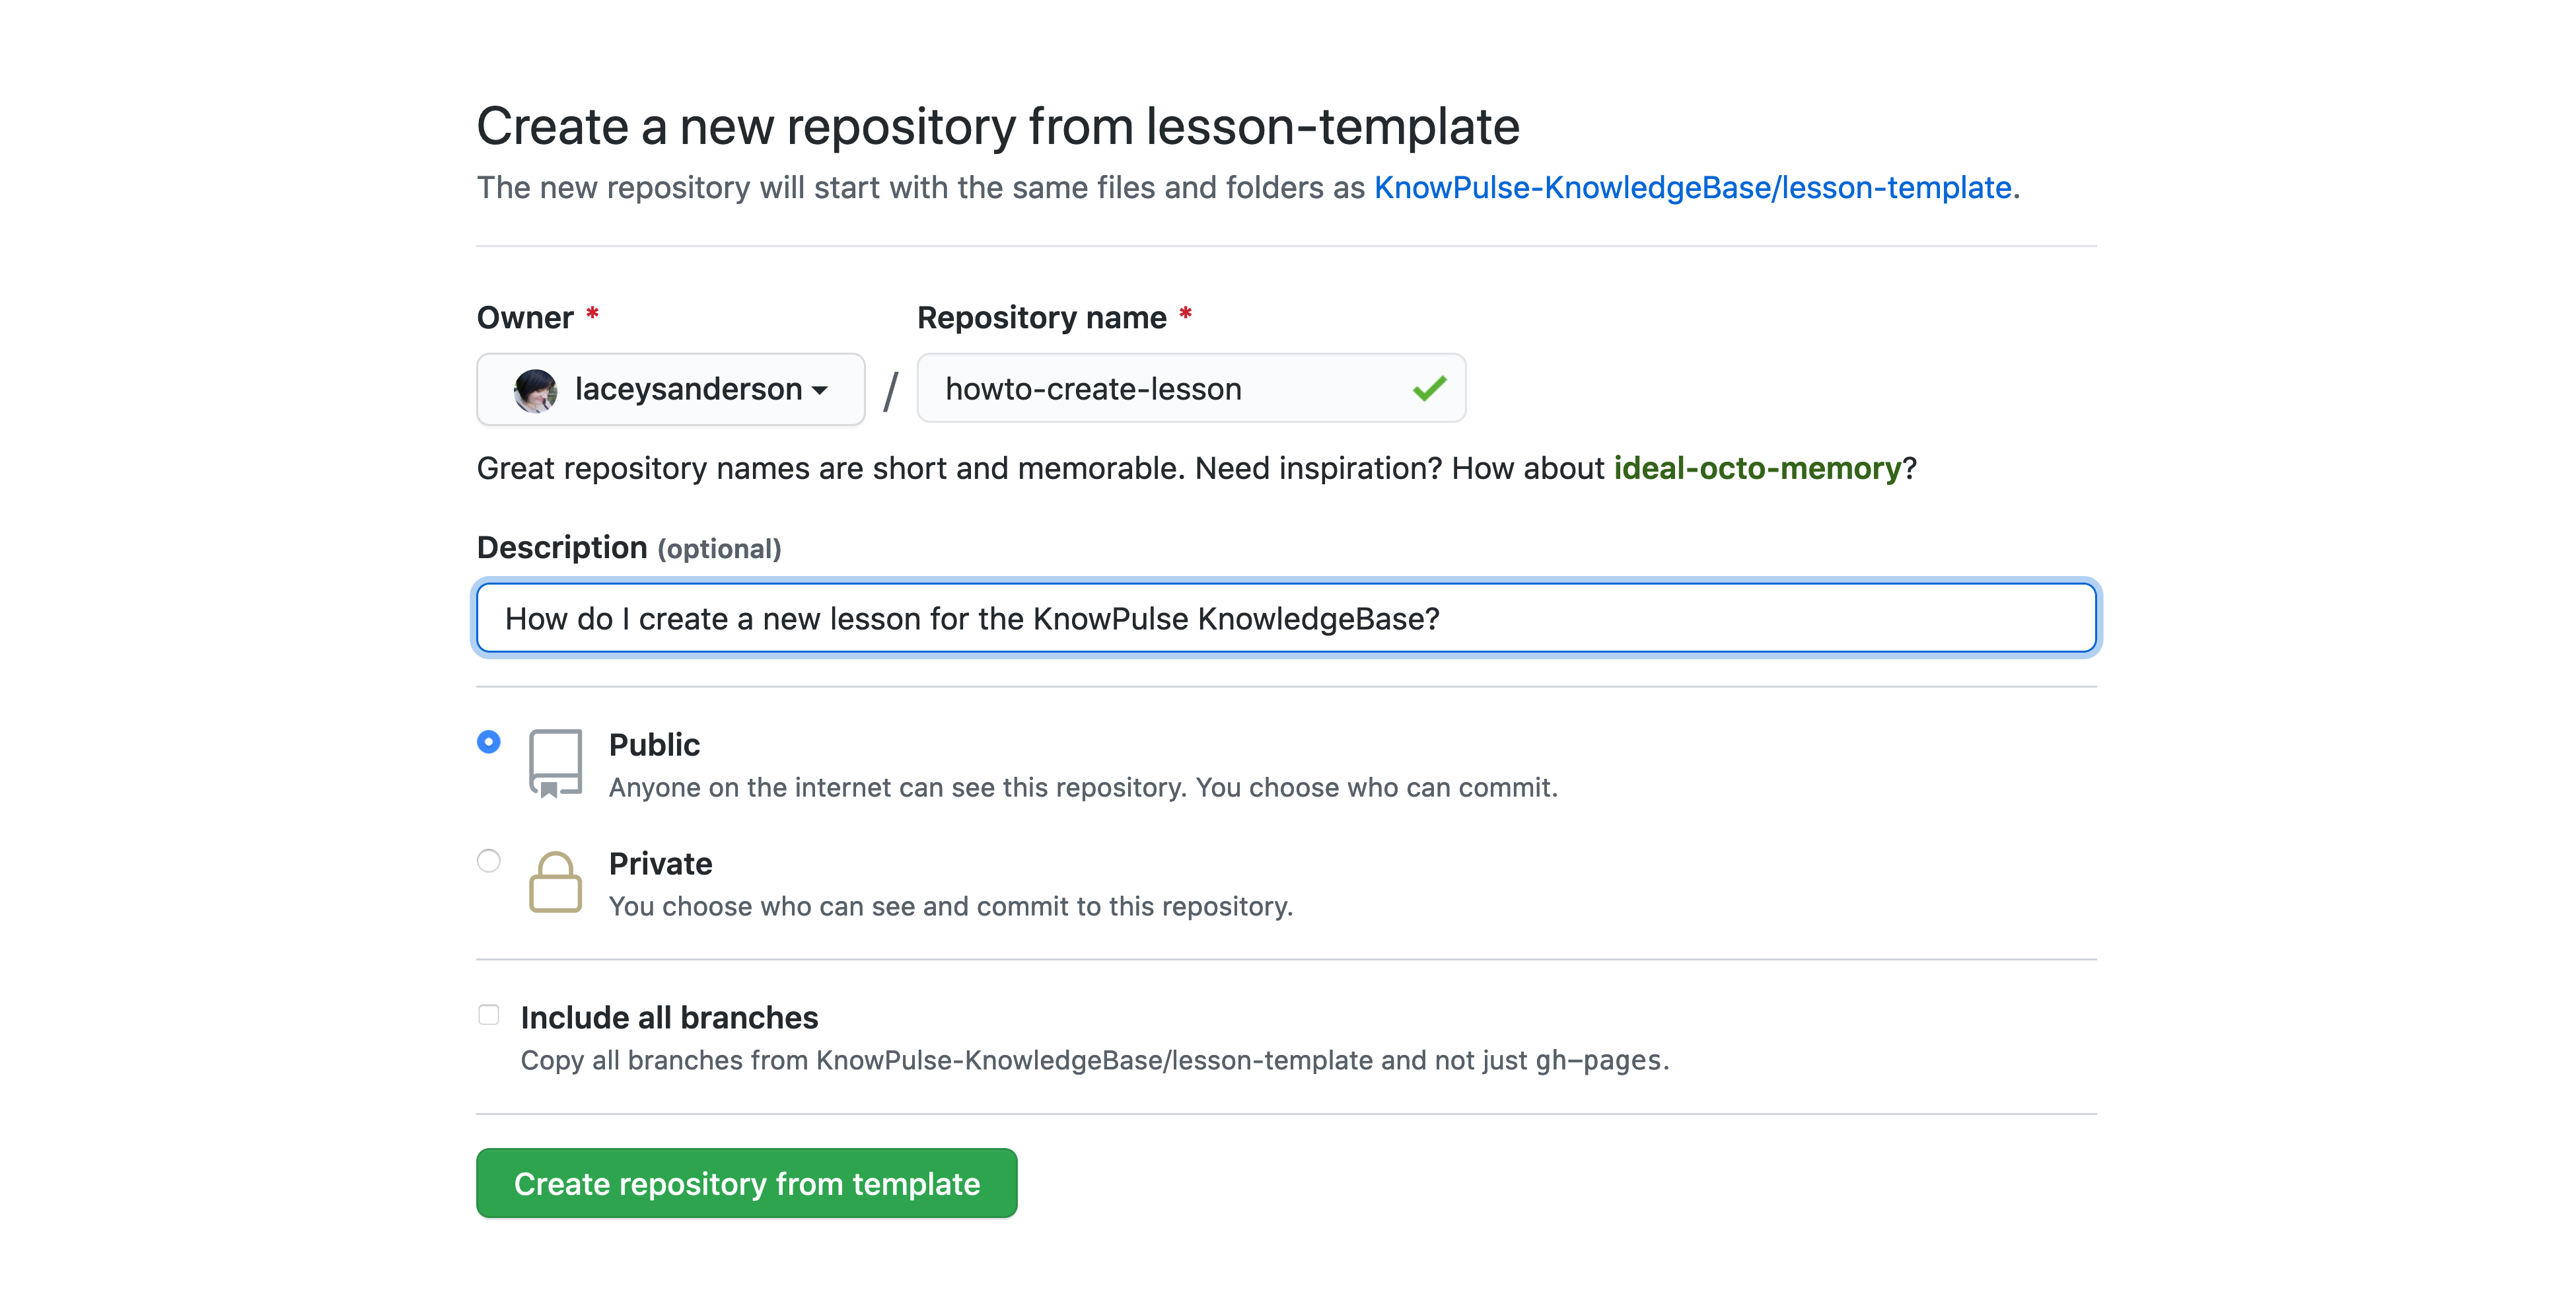
Github will then ask you to title your lesson repository.
- The name should be very short and not include any spaces. Typically, we use dashes between words for easy readability.
- The description should then be the full question your lesson is going to answer.
Key Points
A Lesson should be a complete tutorial to answer a single question.
An episode is a step in your tutorial demonstrating a cohesive collection of tasks.
Create a lesson repository based on the lesson template by clicking Use this template.
Making your lesson a website
Overview
Teaching: 2 min
Exercises: 5 minQuestions
How is my lesson made into a webpage?
How do I update it?
Objectives
Publish you lesson to the web.
Make it a website!
Next, we want to setup Github Pages. This is how your lesson will be made into a professional website for free! And even better, setting it up is as easy as changing the settings on your repository!
First, go to settings in the top menu bar at the far right.

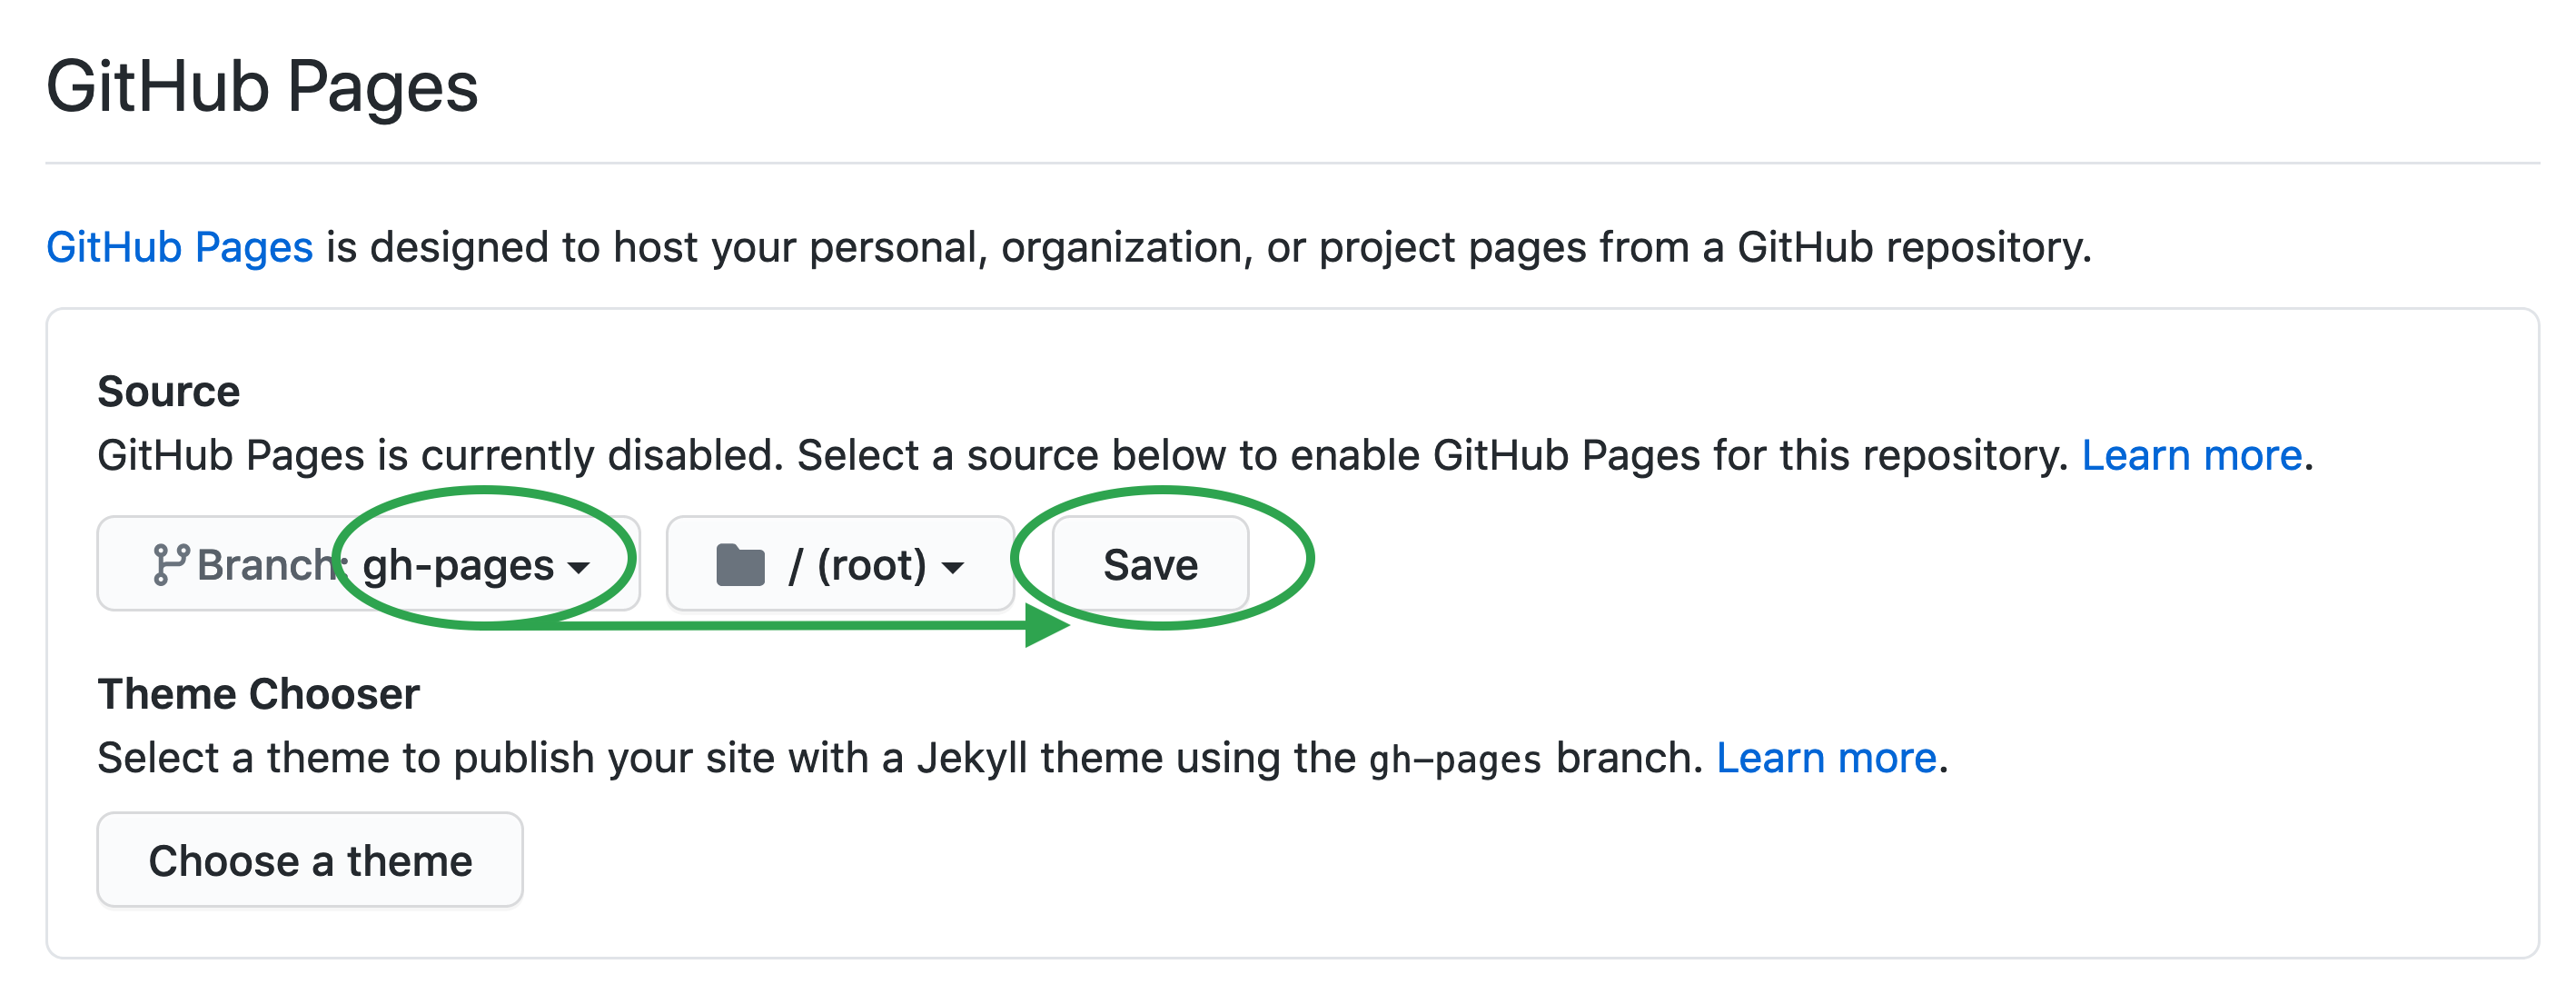
This is where you can change any settings for your repository but for our purposes we are going to scroll down on the first page to where is says Github Pages. Just click on the drop-down saying None and change it to gh-pages. Then click Save. DO NOT set a theme.
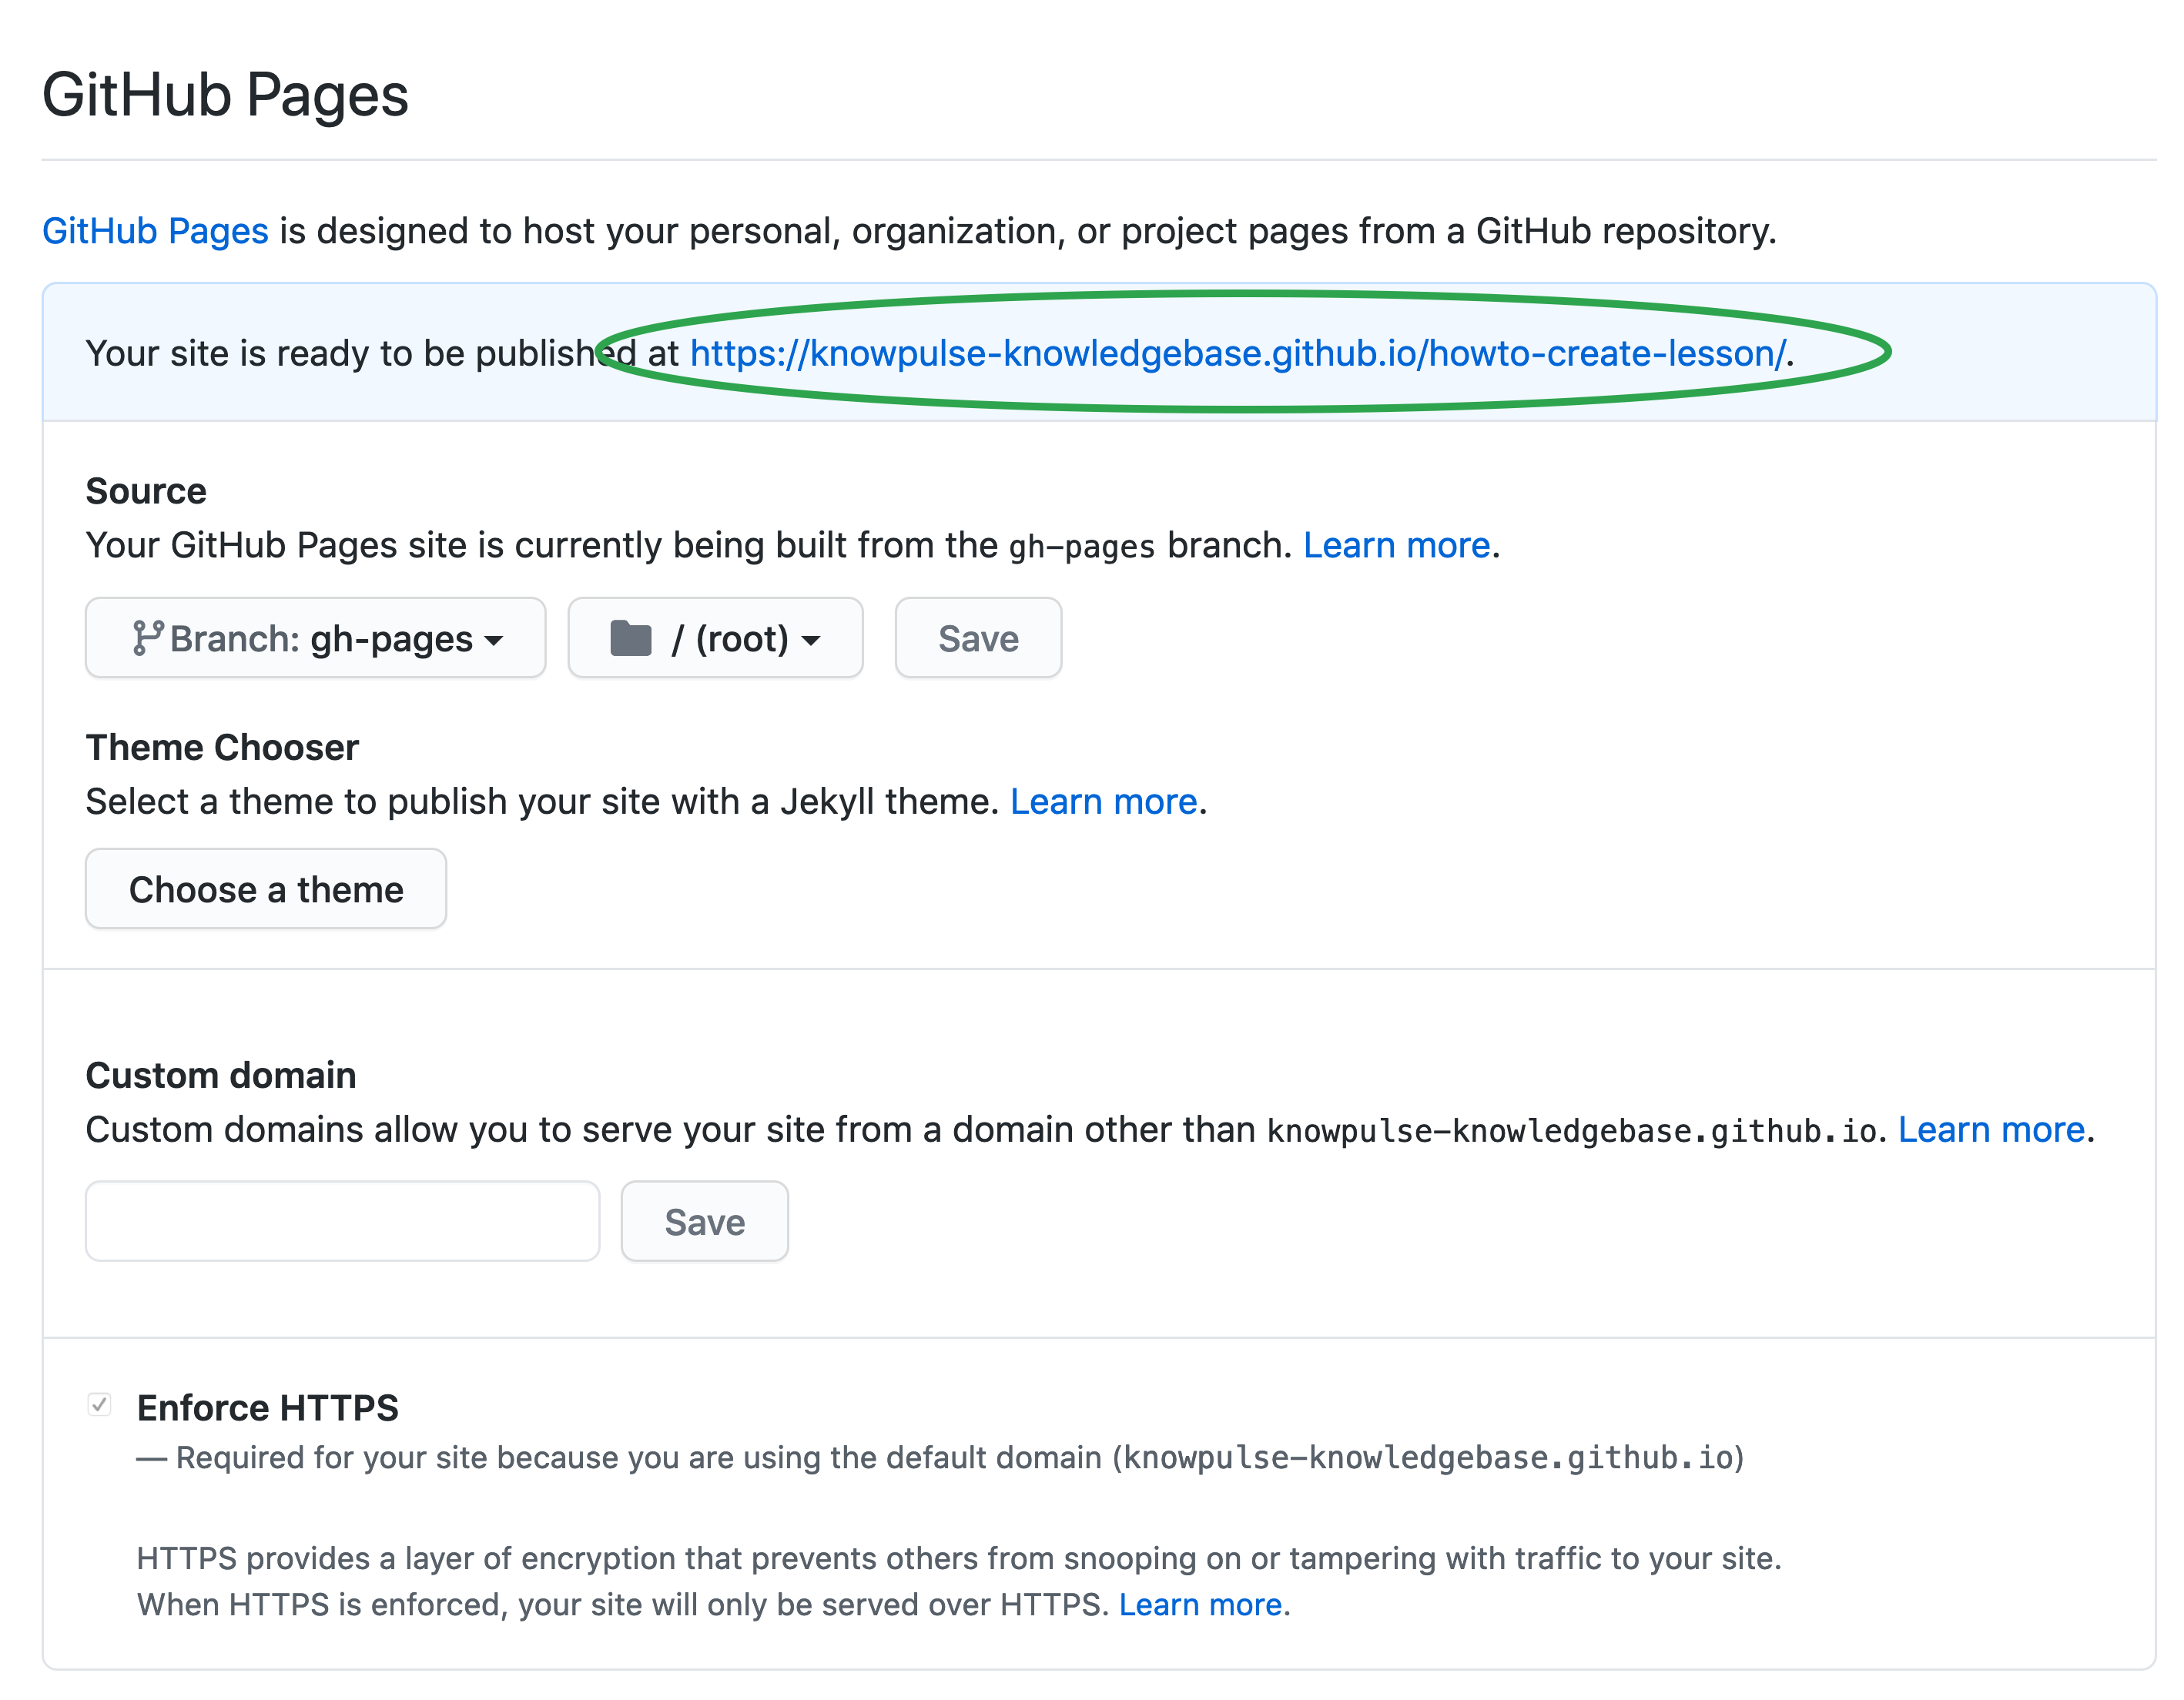
This will then trigger an automatic build of your website and after a minute or so, the settings will provide you a link to your website (blue highlighted section)!
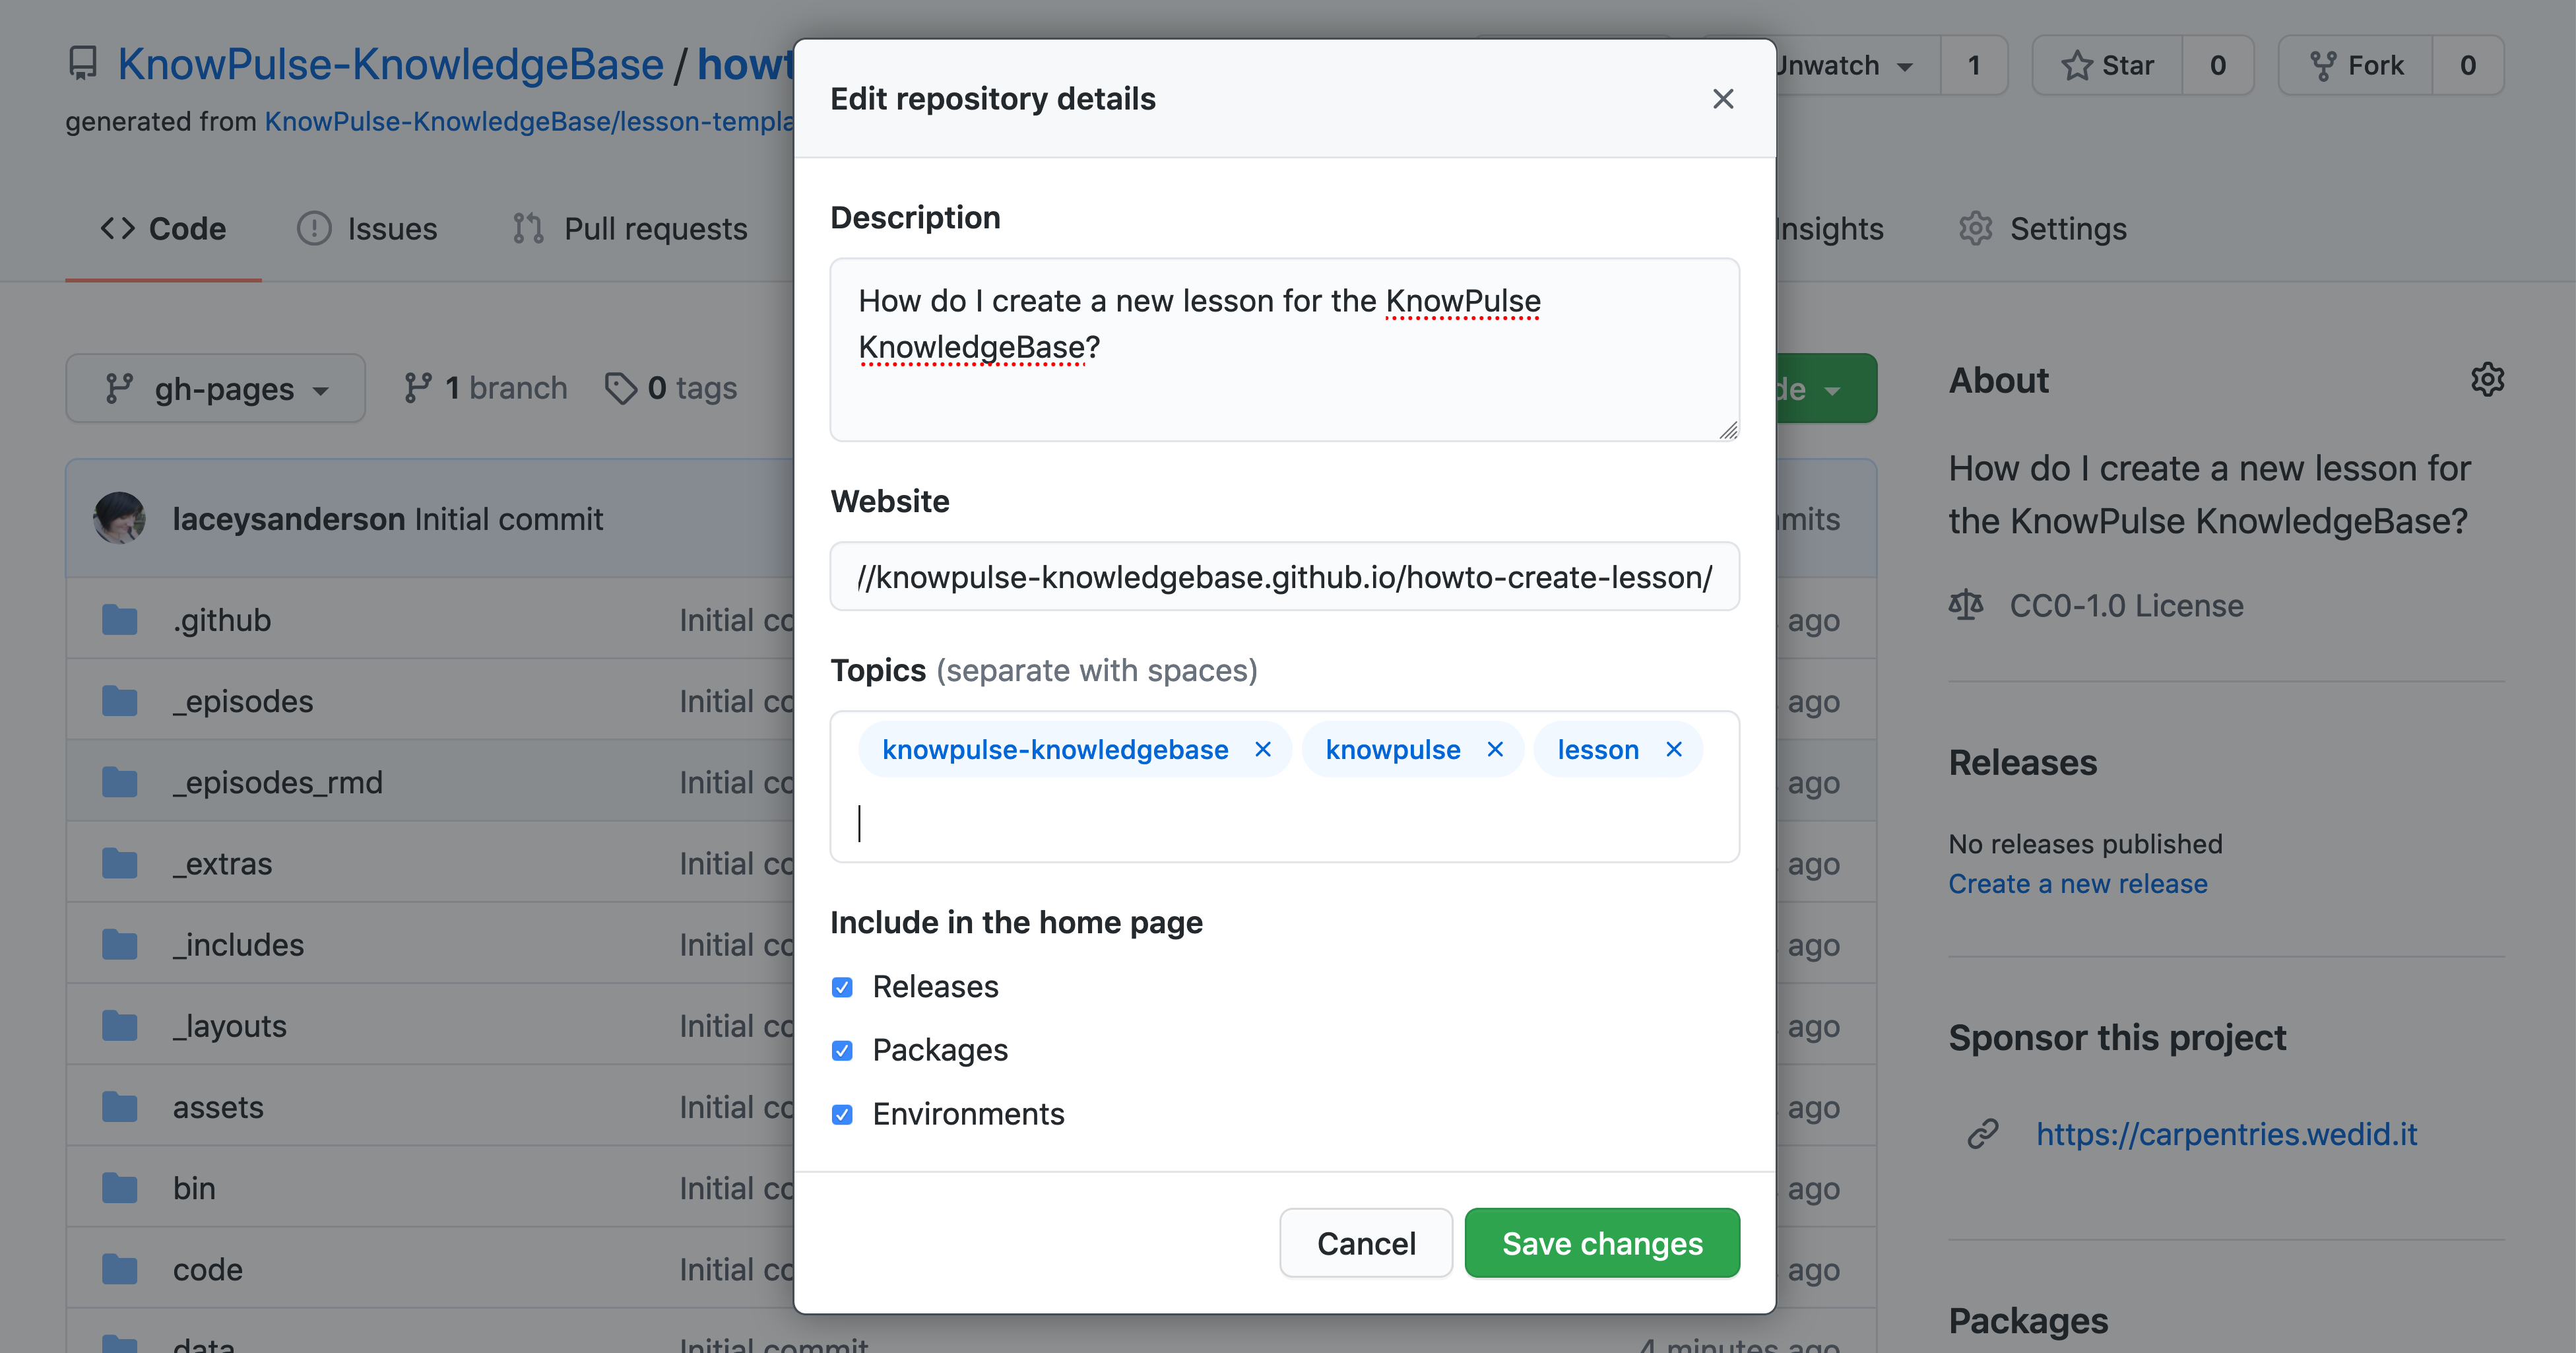
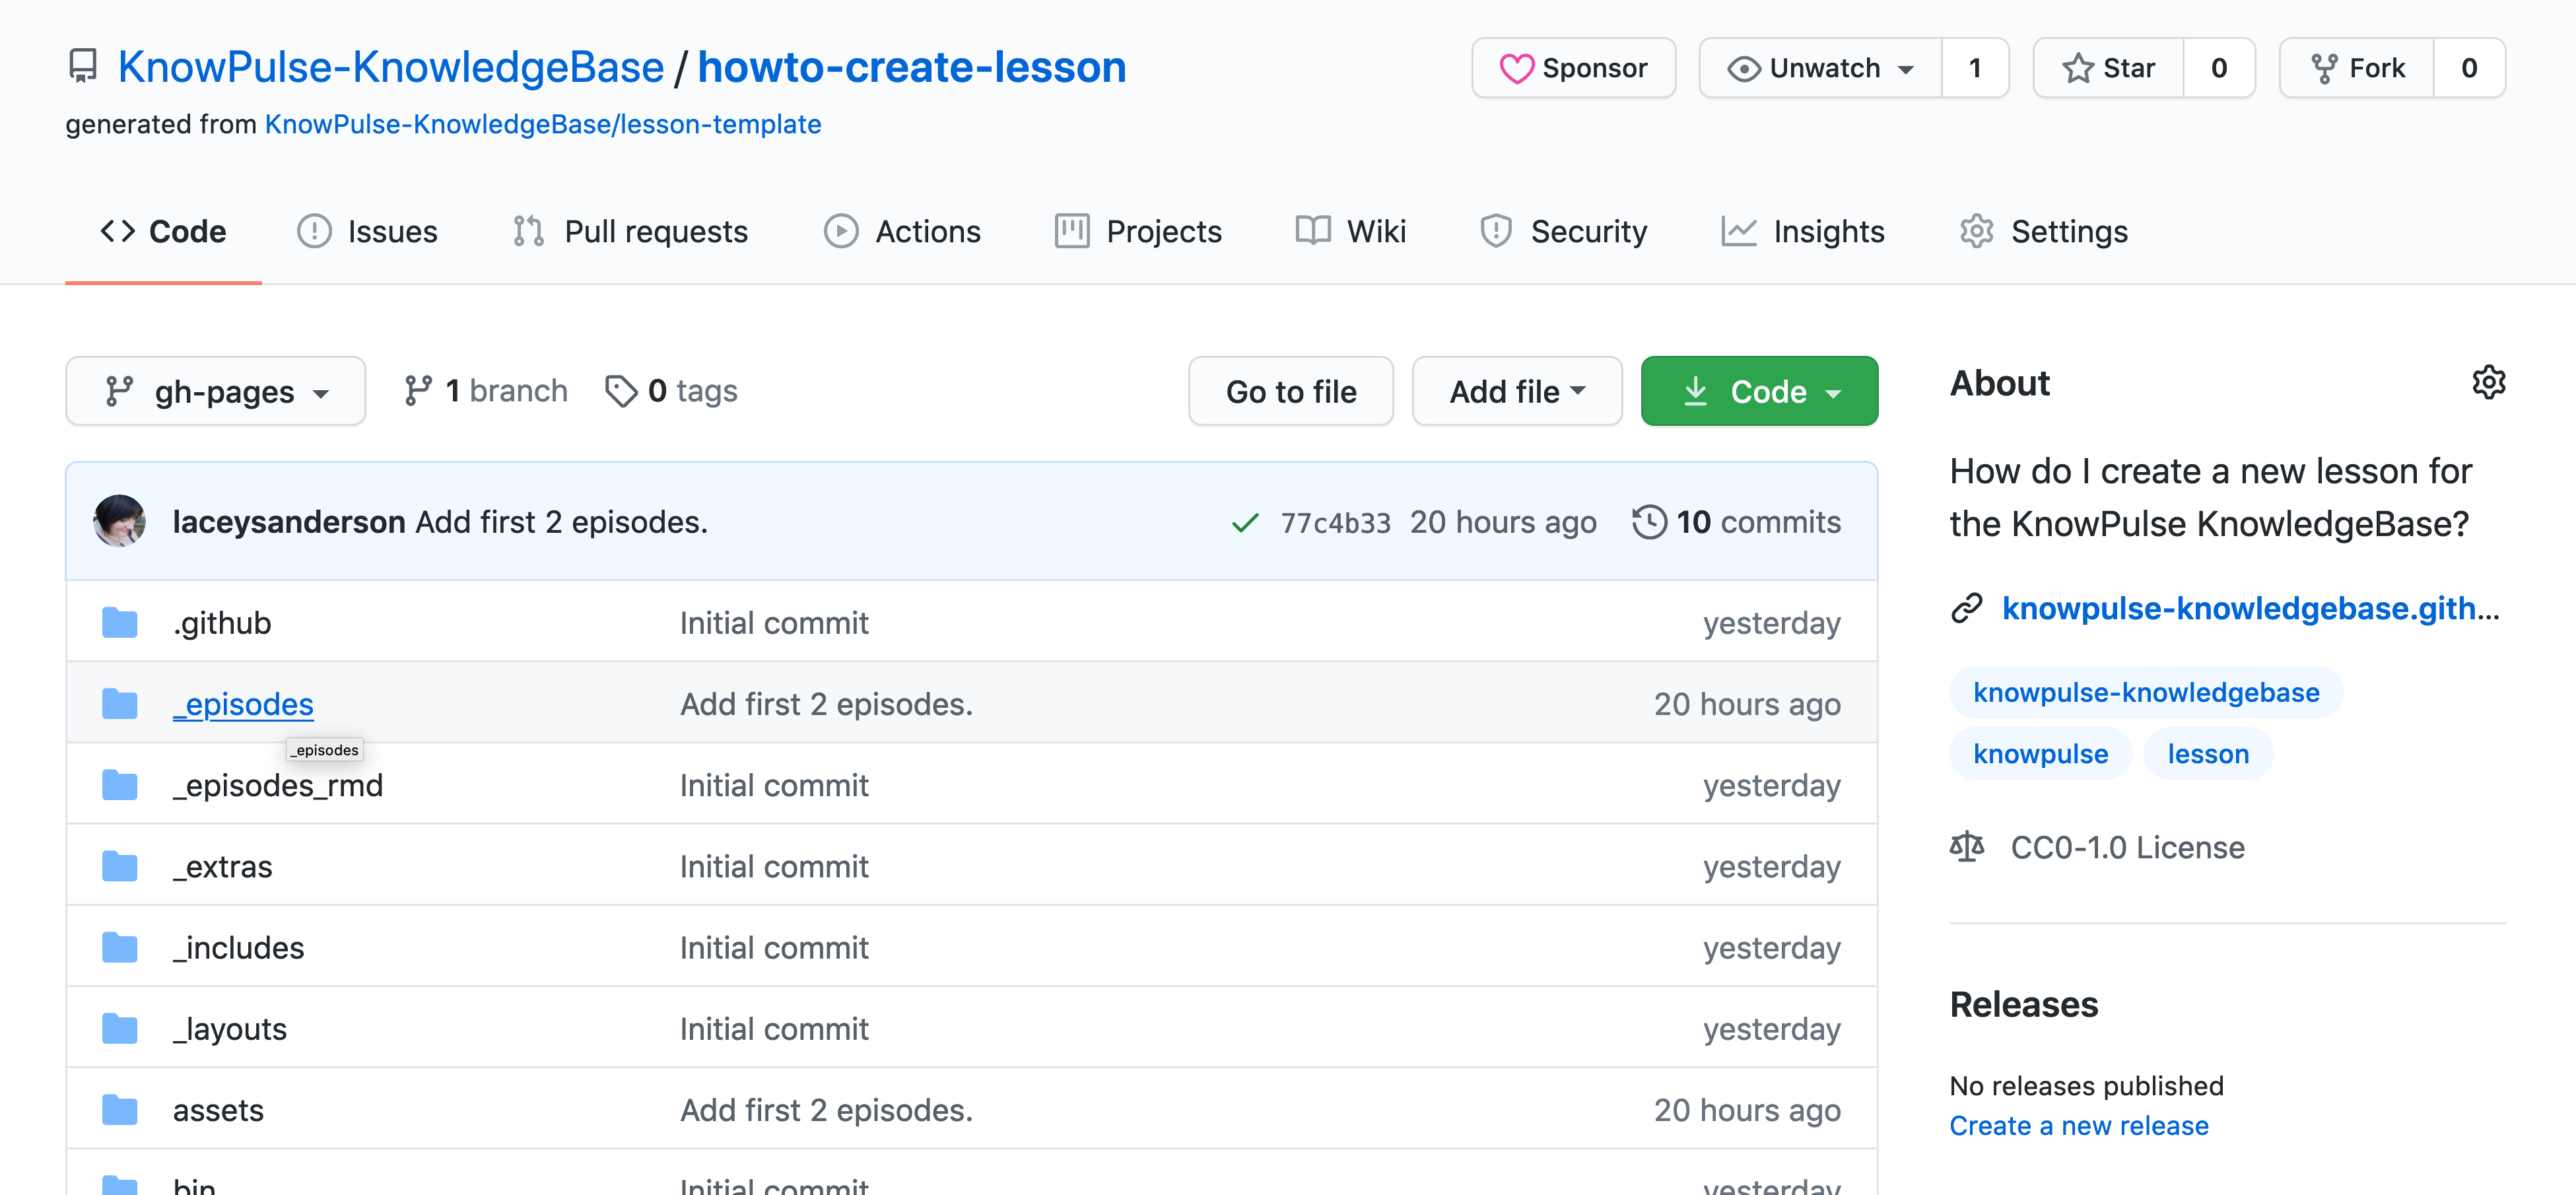
Copy the link and add it to your repository main page. This is done by clicking on the gear beside about which will bring up the following edit form. Paste the URL in the website box and add the tags: knowpulse-knowledgebase, knowpulse, lesson. The tags will help us and others find your repository!
Finally, open the link in a new browser tab and your default webpage should be ready! This will be automatically updated everytime you commit (i.e. save) changes to your repository.
NOTE: It takes a couple minutes to see the changes reflected in your webpage after you commit/save changes to it.
Key Points
You can configure your lesson to be delivered as a webpage using Github Pages.
Edit the settings for your repository and select the gh-pages branch to publish your website.
Your lesson is updated automatically when you make changes!
Customize your lesson
Overview
Teaching: 5 min
Exercises: 10 minQuestions
How do I provide details for my lesson?
There is placehold text… how do I make it go away?
Objectives
Provide details for your lesson
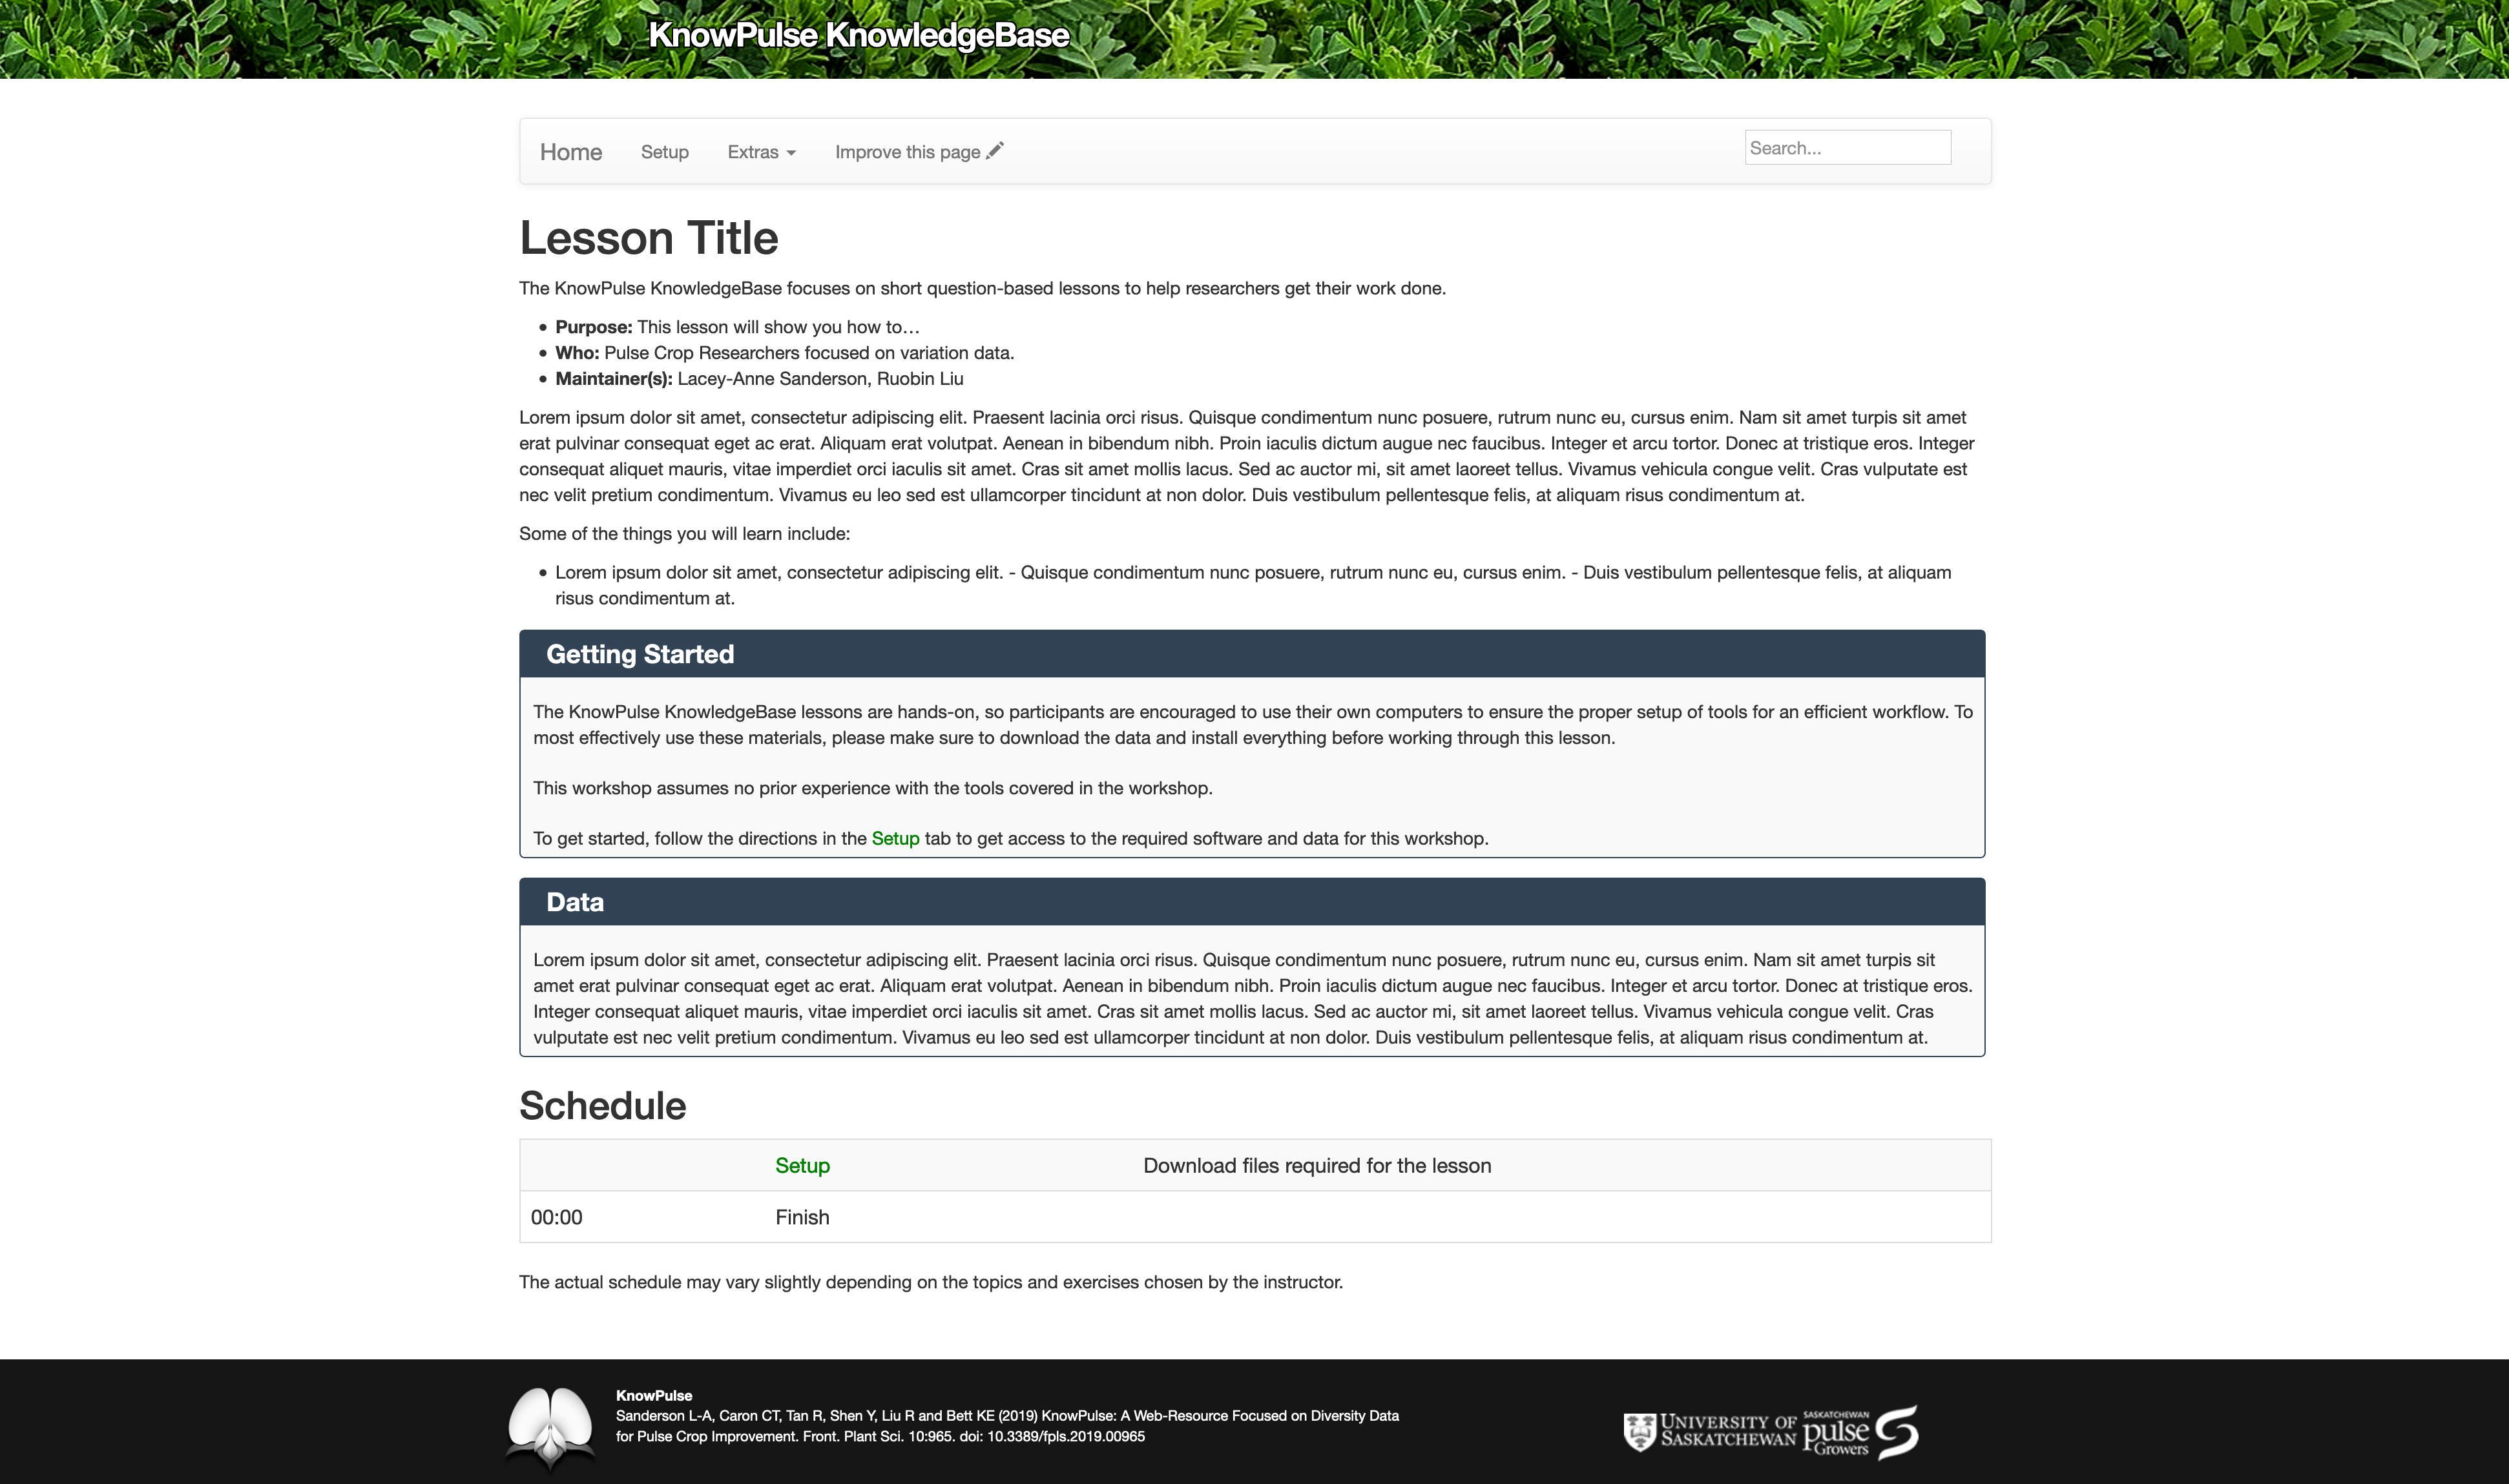
When you made your lesson a website you may have noticed the main page contained placeholder text which did not apply to your lesson. If you did then you may be wondering how to replace this text with useful information!
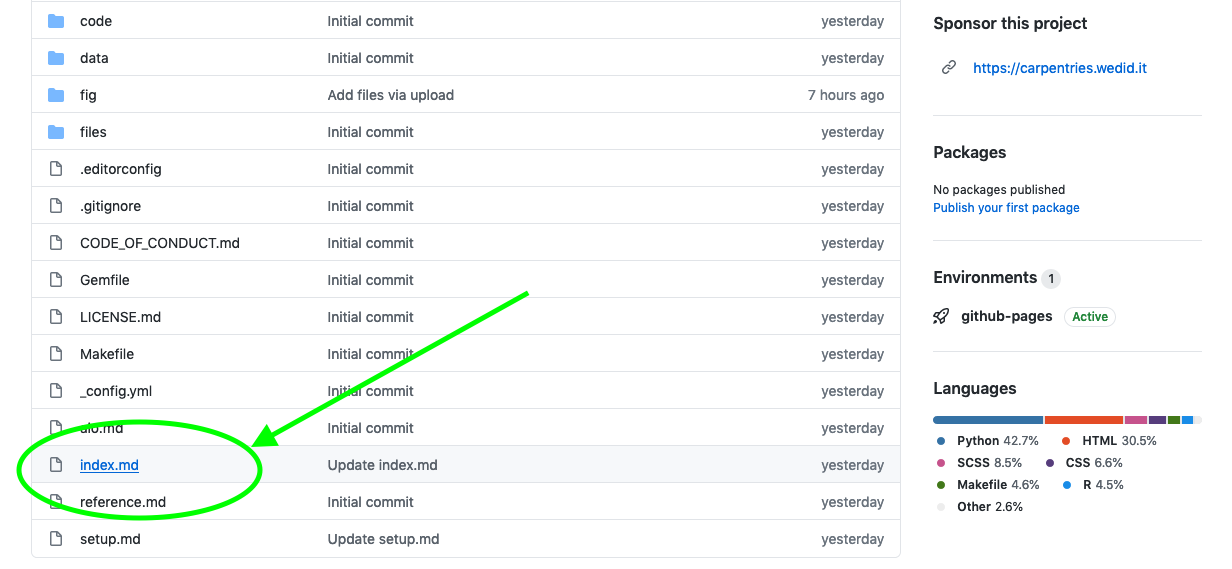
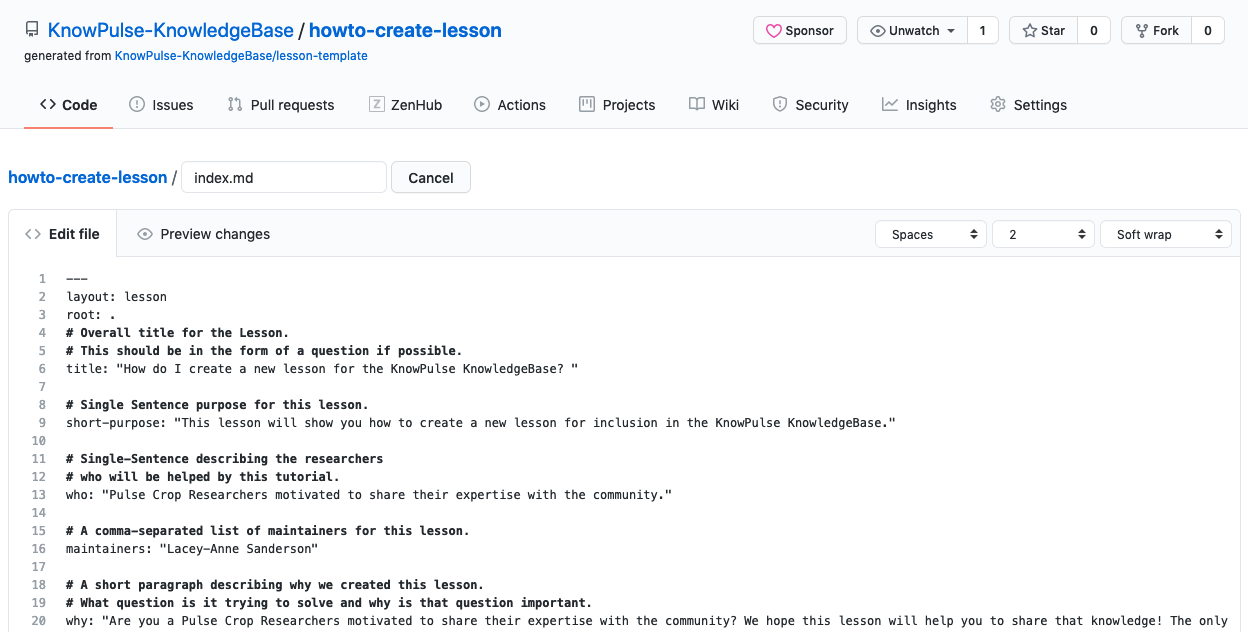
Luckily it’s as easy as editing the index.md file and replacing the top metadata with information about your lesson!
To do this, click on the index.md filename, then click on the edit pencil in the top, right corner.
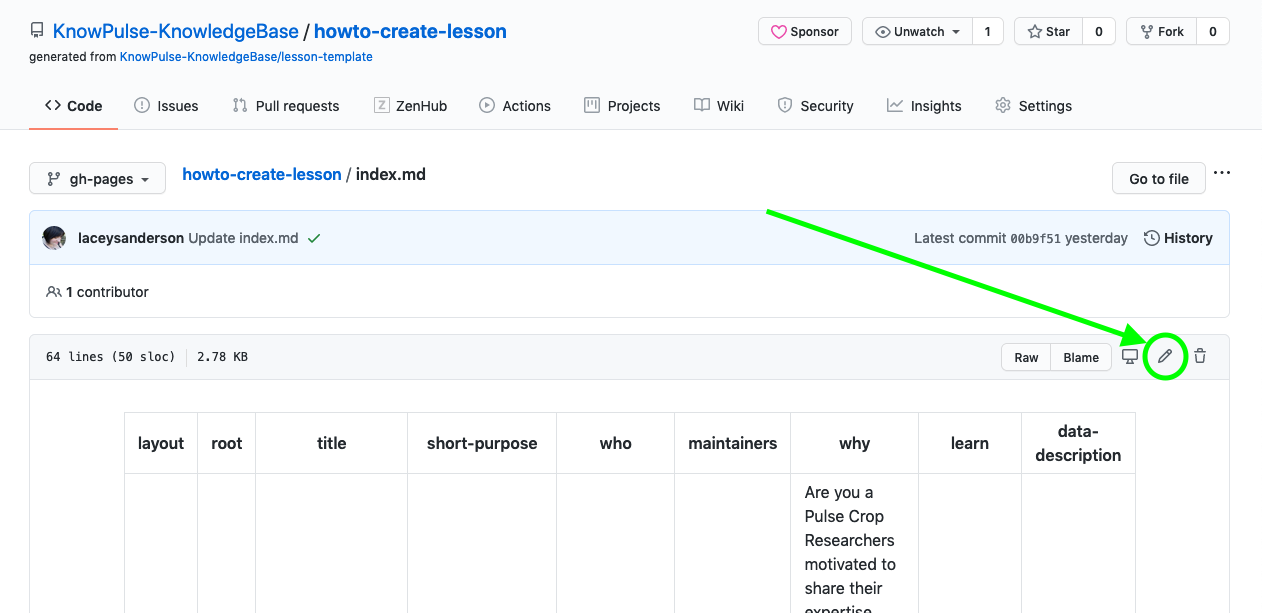
This will bring up a page where you can enter the details for your lesson. There are comments (prefixed with #) to help you.
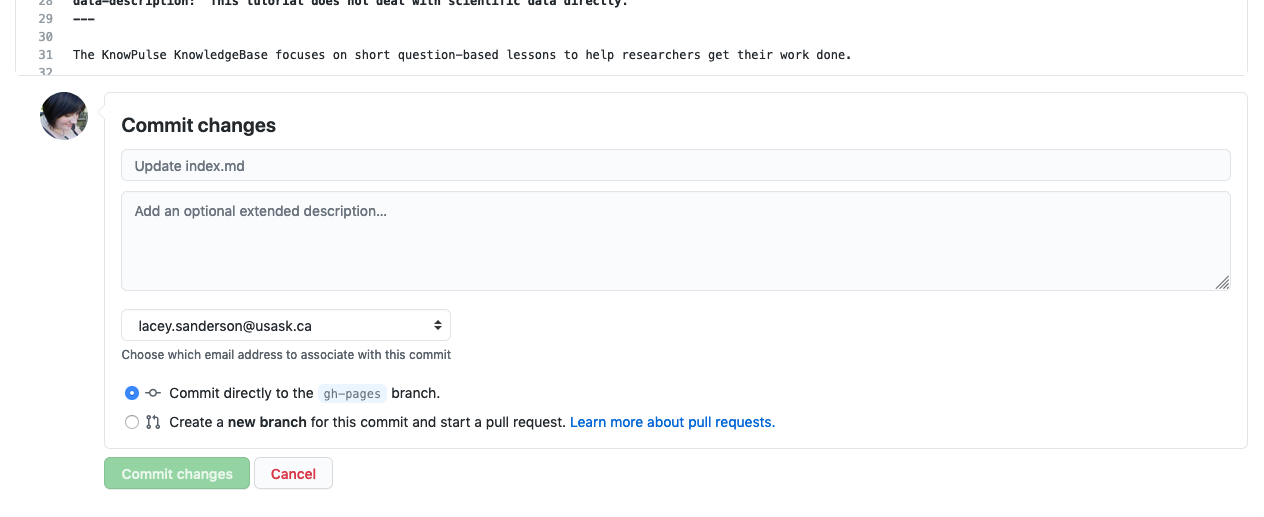
Once you are done, click commit at the bottom of the page and your lesson will be automatically updated within a couple minutes.
Key Points
Edit the index.md file but just change the top metadata.
Creating an episode
Overview
Teaching: 10 min
Exercises: 20 minQuestions
How do I add an episode to my lesson?
What is this table at the top of my Markdown page?
How do I add images? Headers? Code samples?
Objectives
Add an episode to your lesson
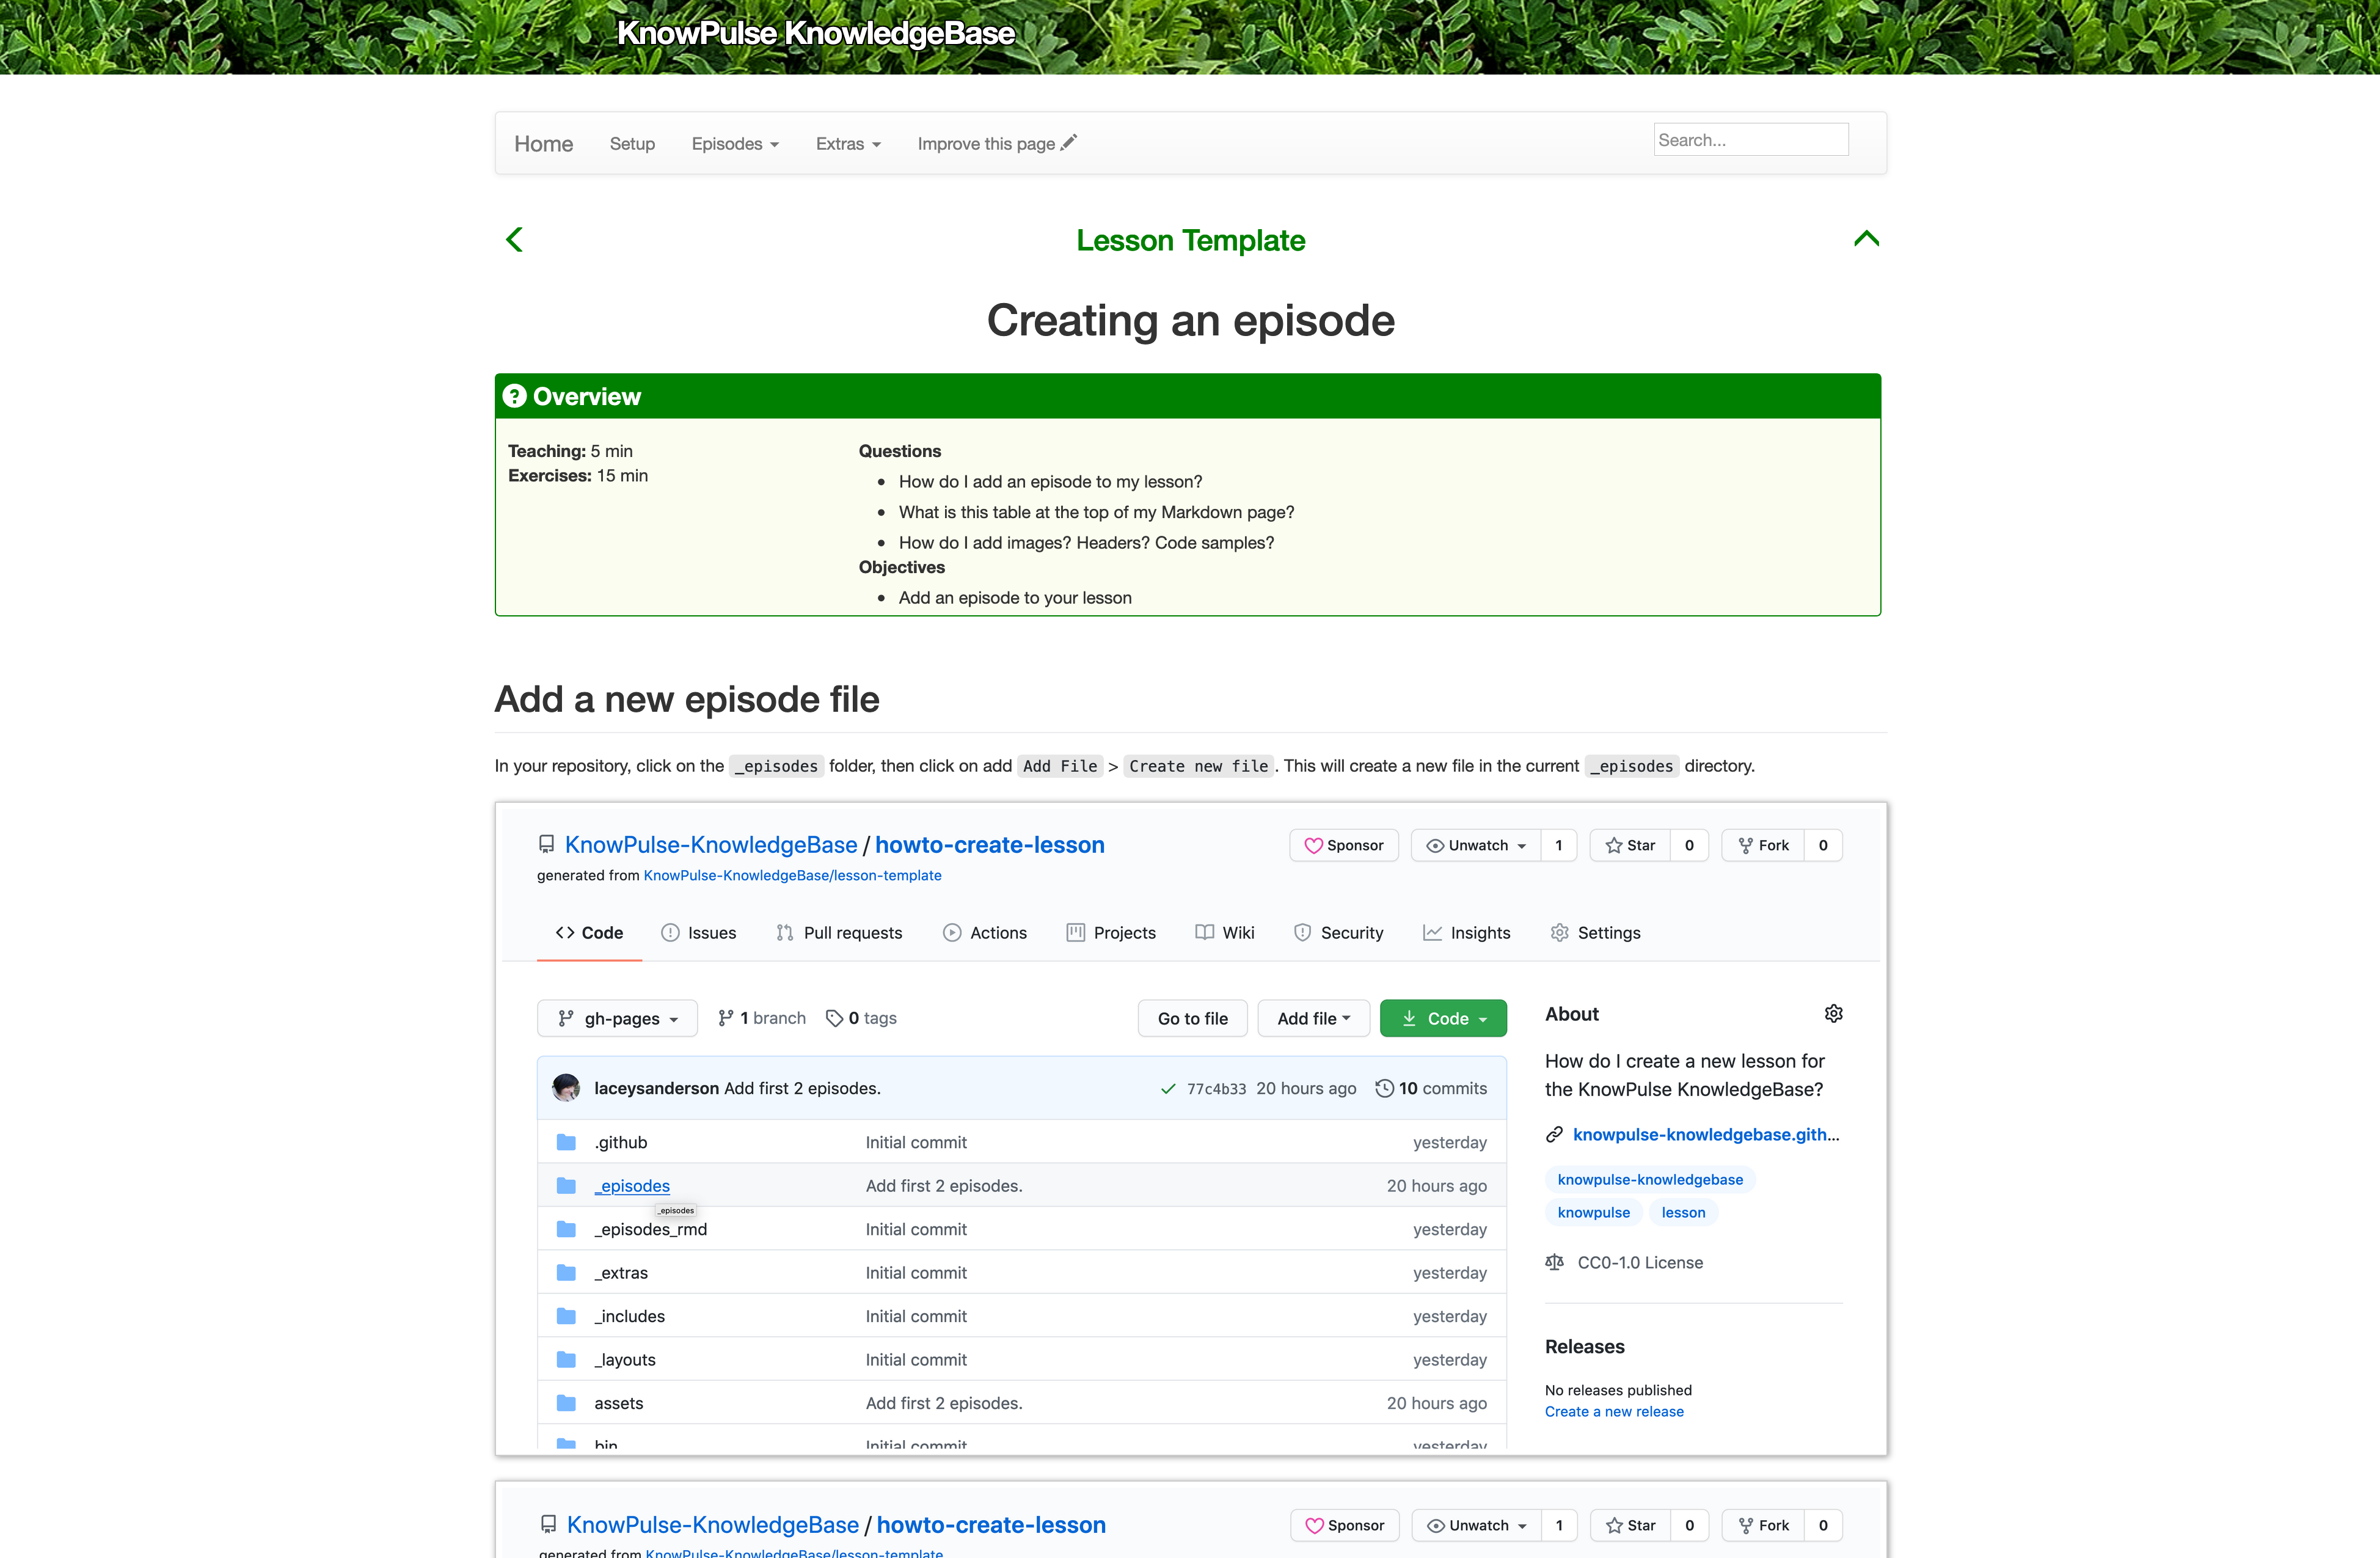
Add a new episode file
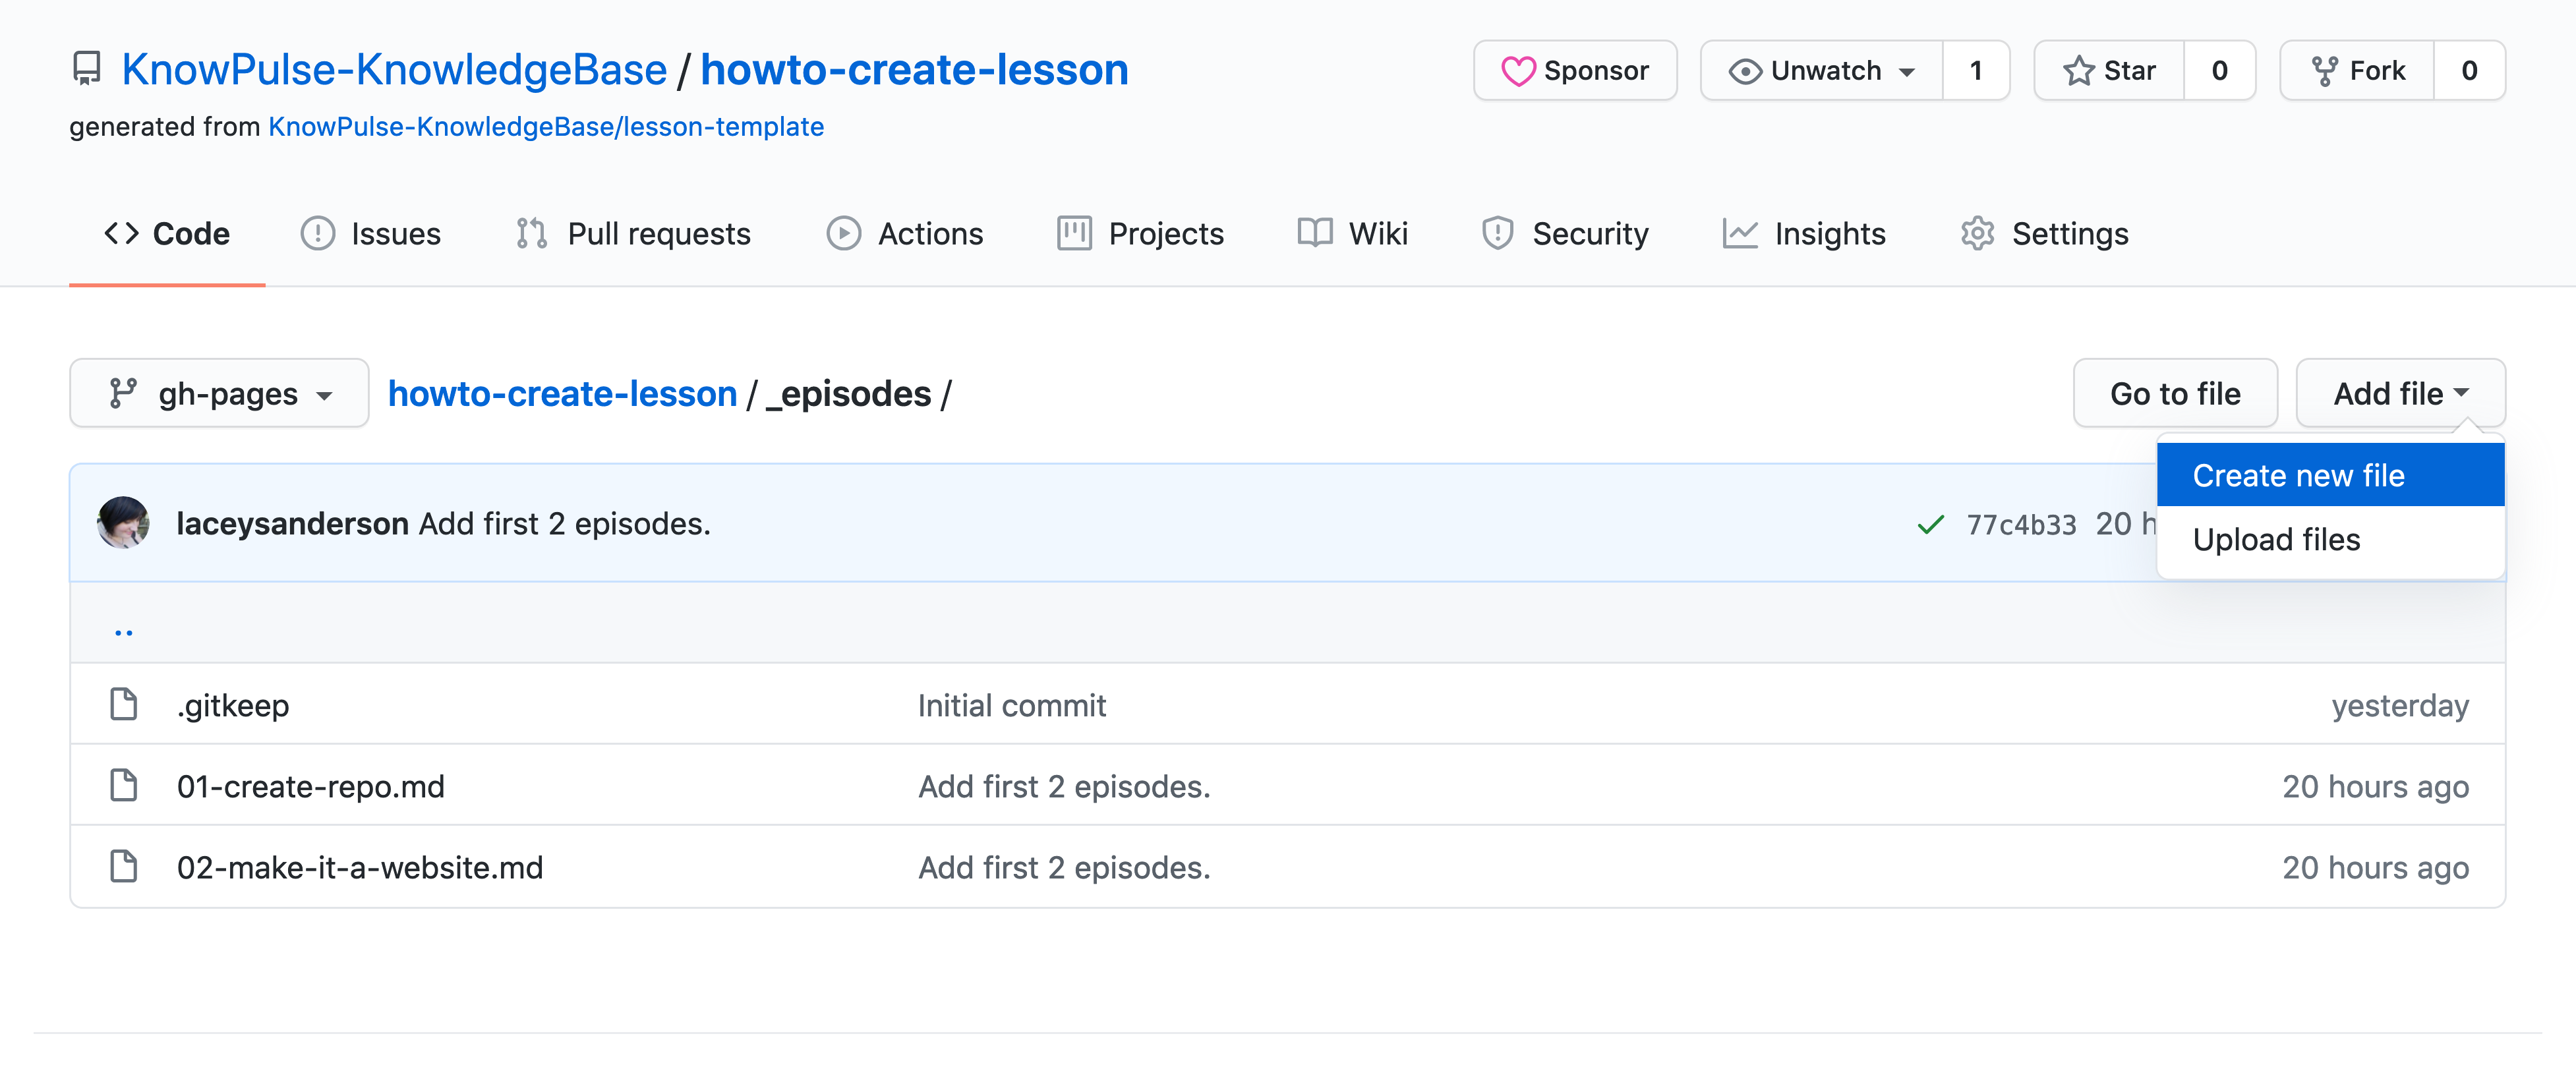
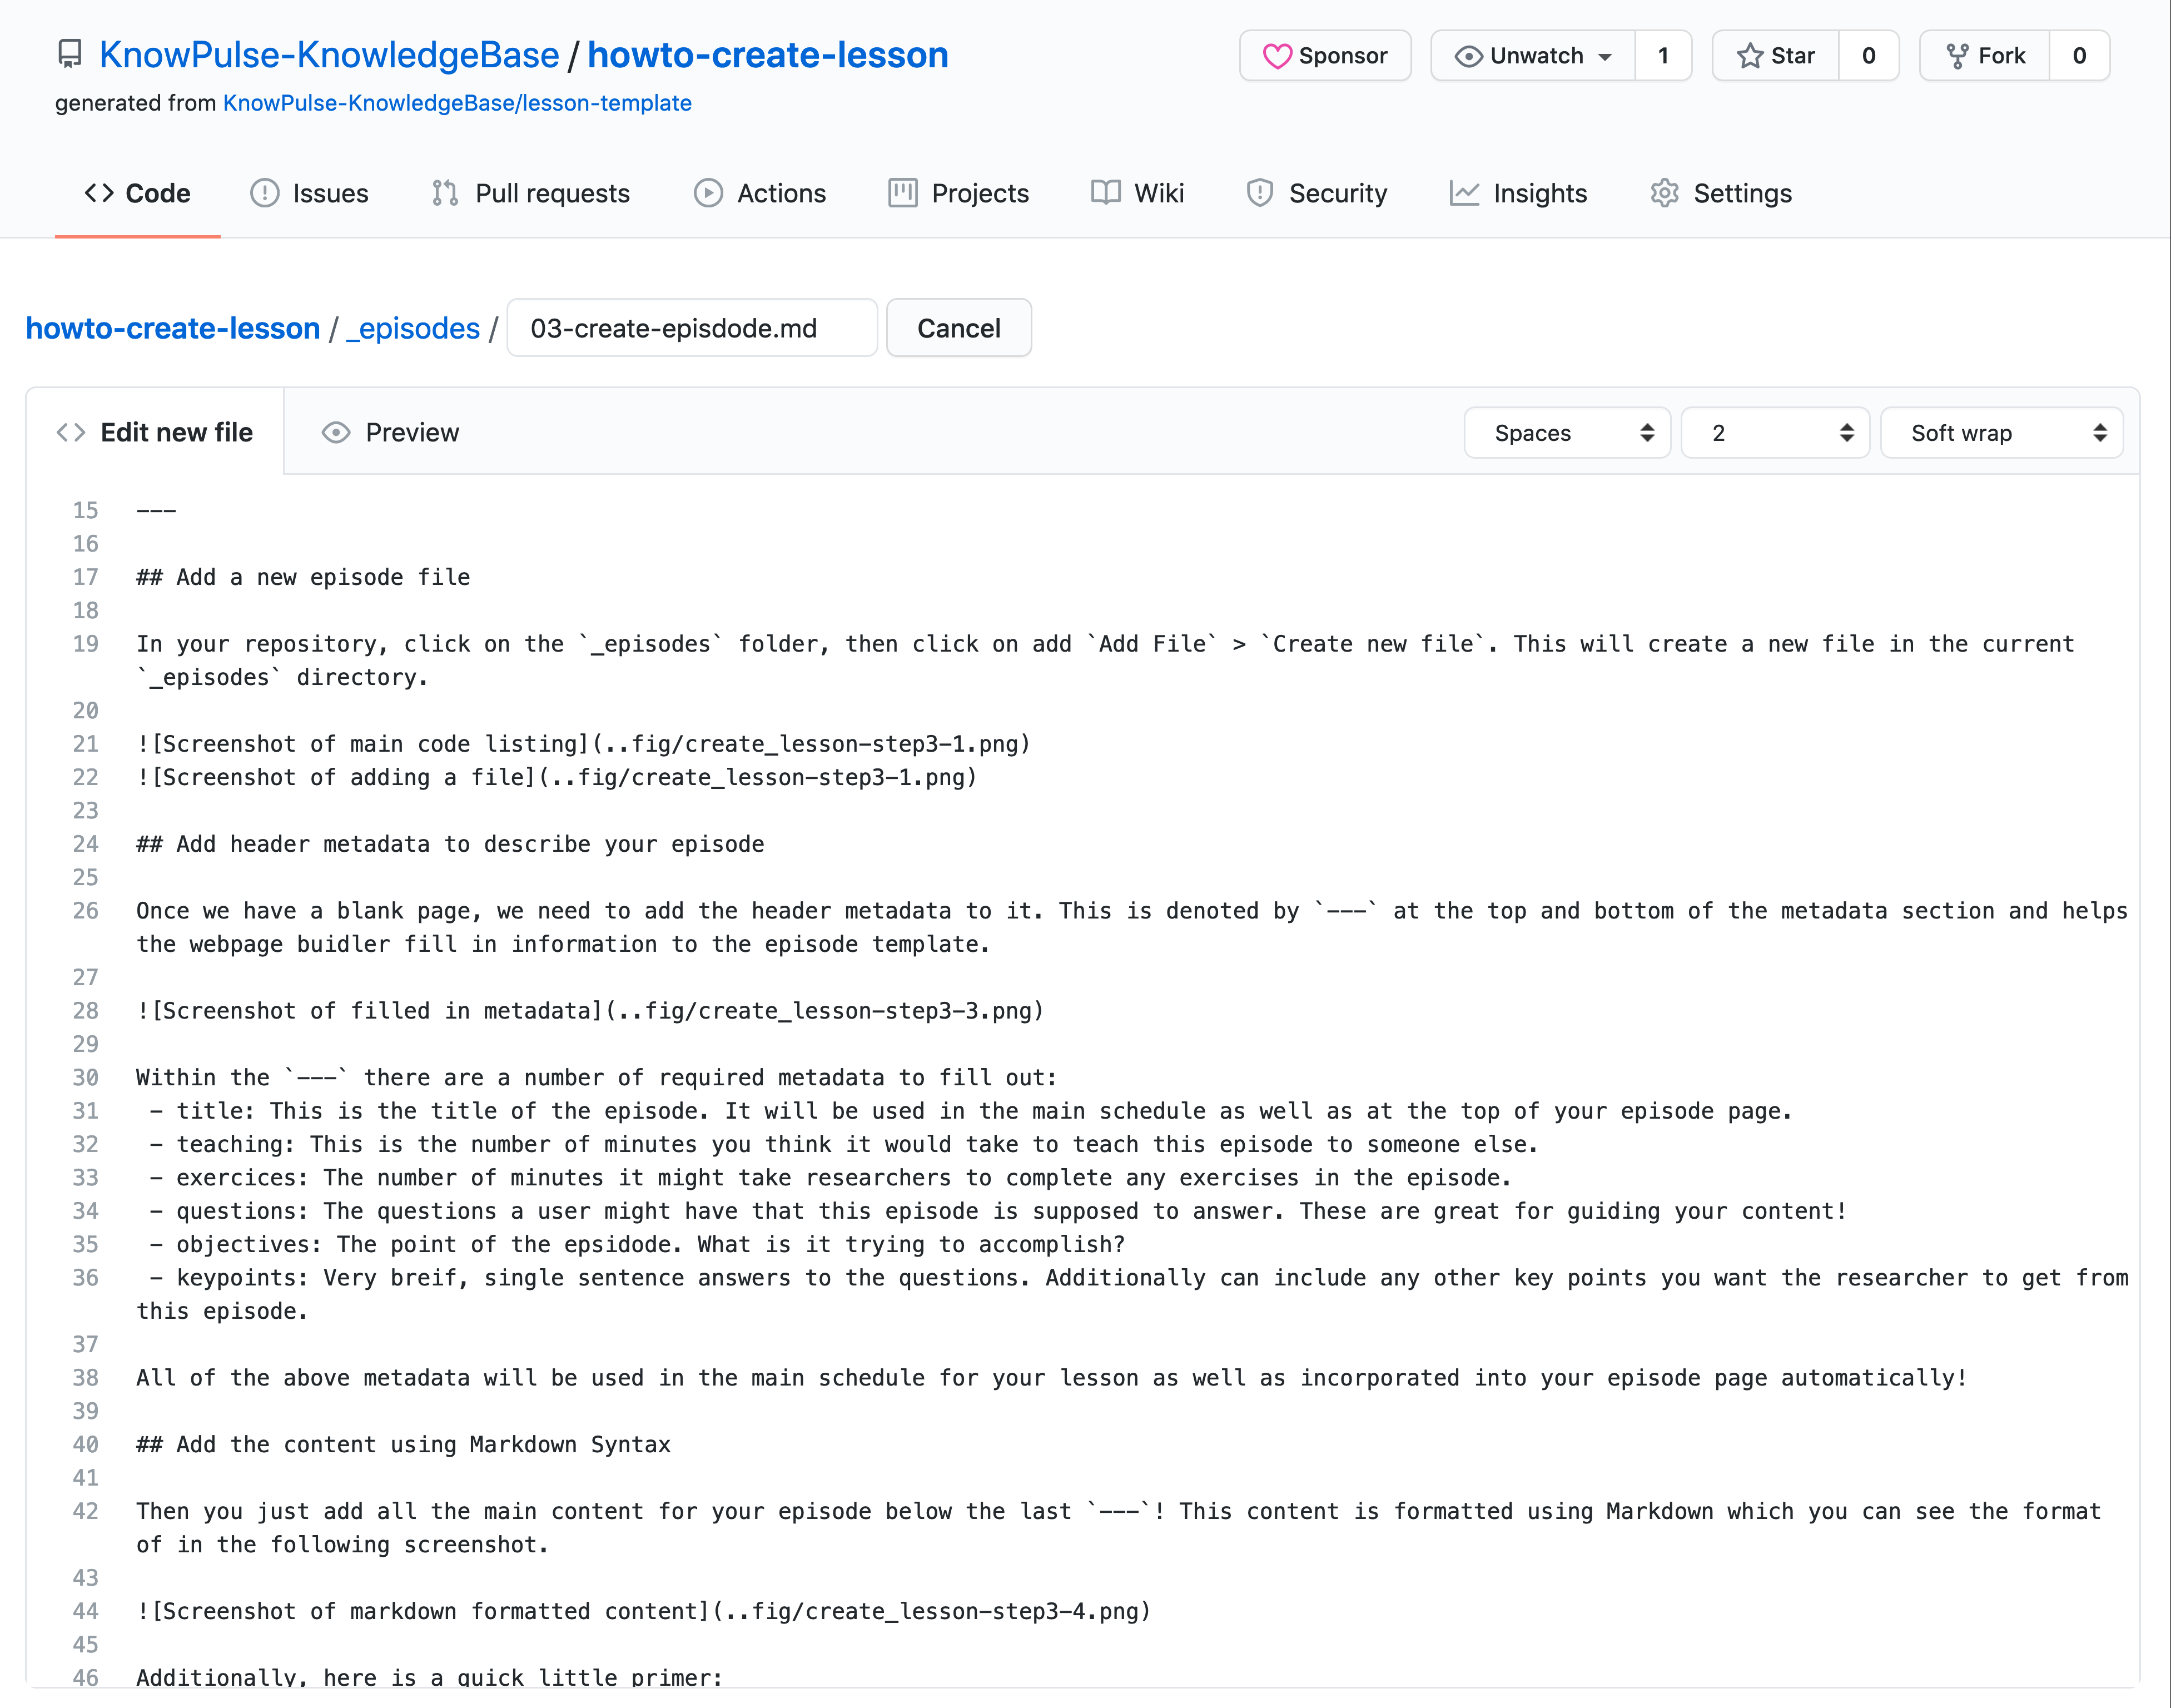
In your repository, click on the _episodes folder, then click on add Add File > Create new file. This will create a new file in the current _episodes directory.
Add header metadata to describe your episode
Once we have a blank page, we need to add the header metadata to it. This is denoted by --- at the top and bottom of the metadata section and helps the webpage buidler fill in information to the episode template.
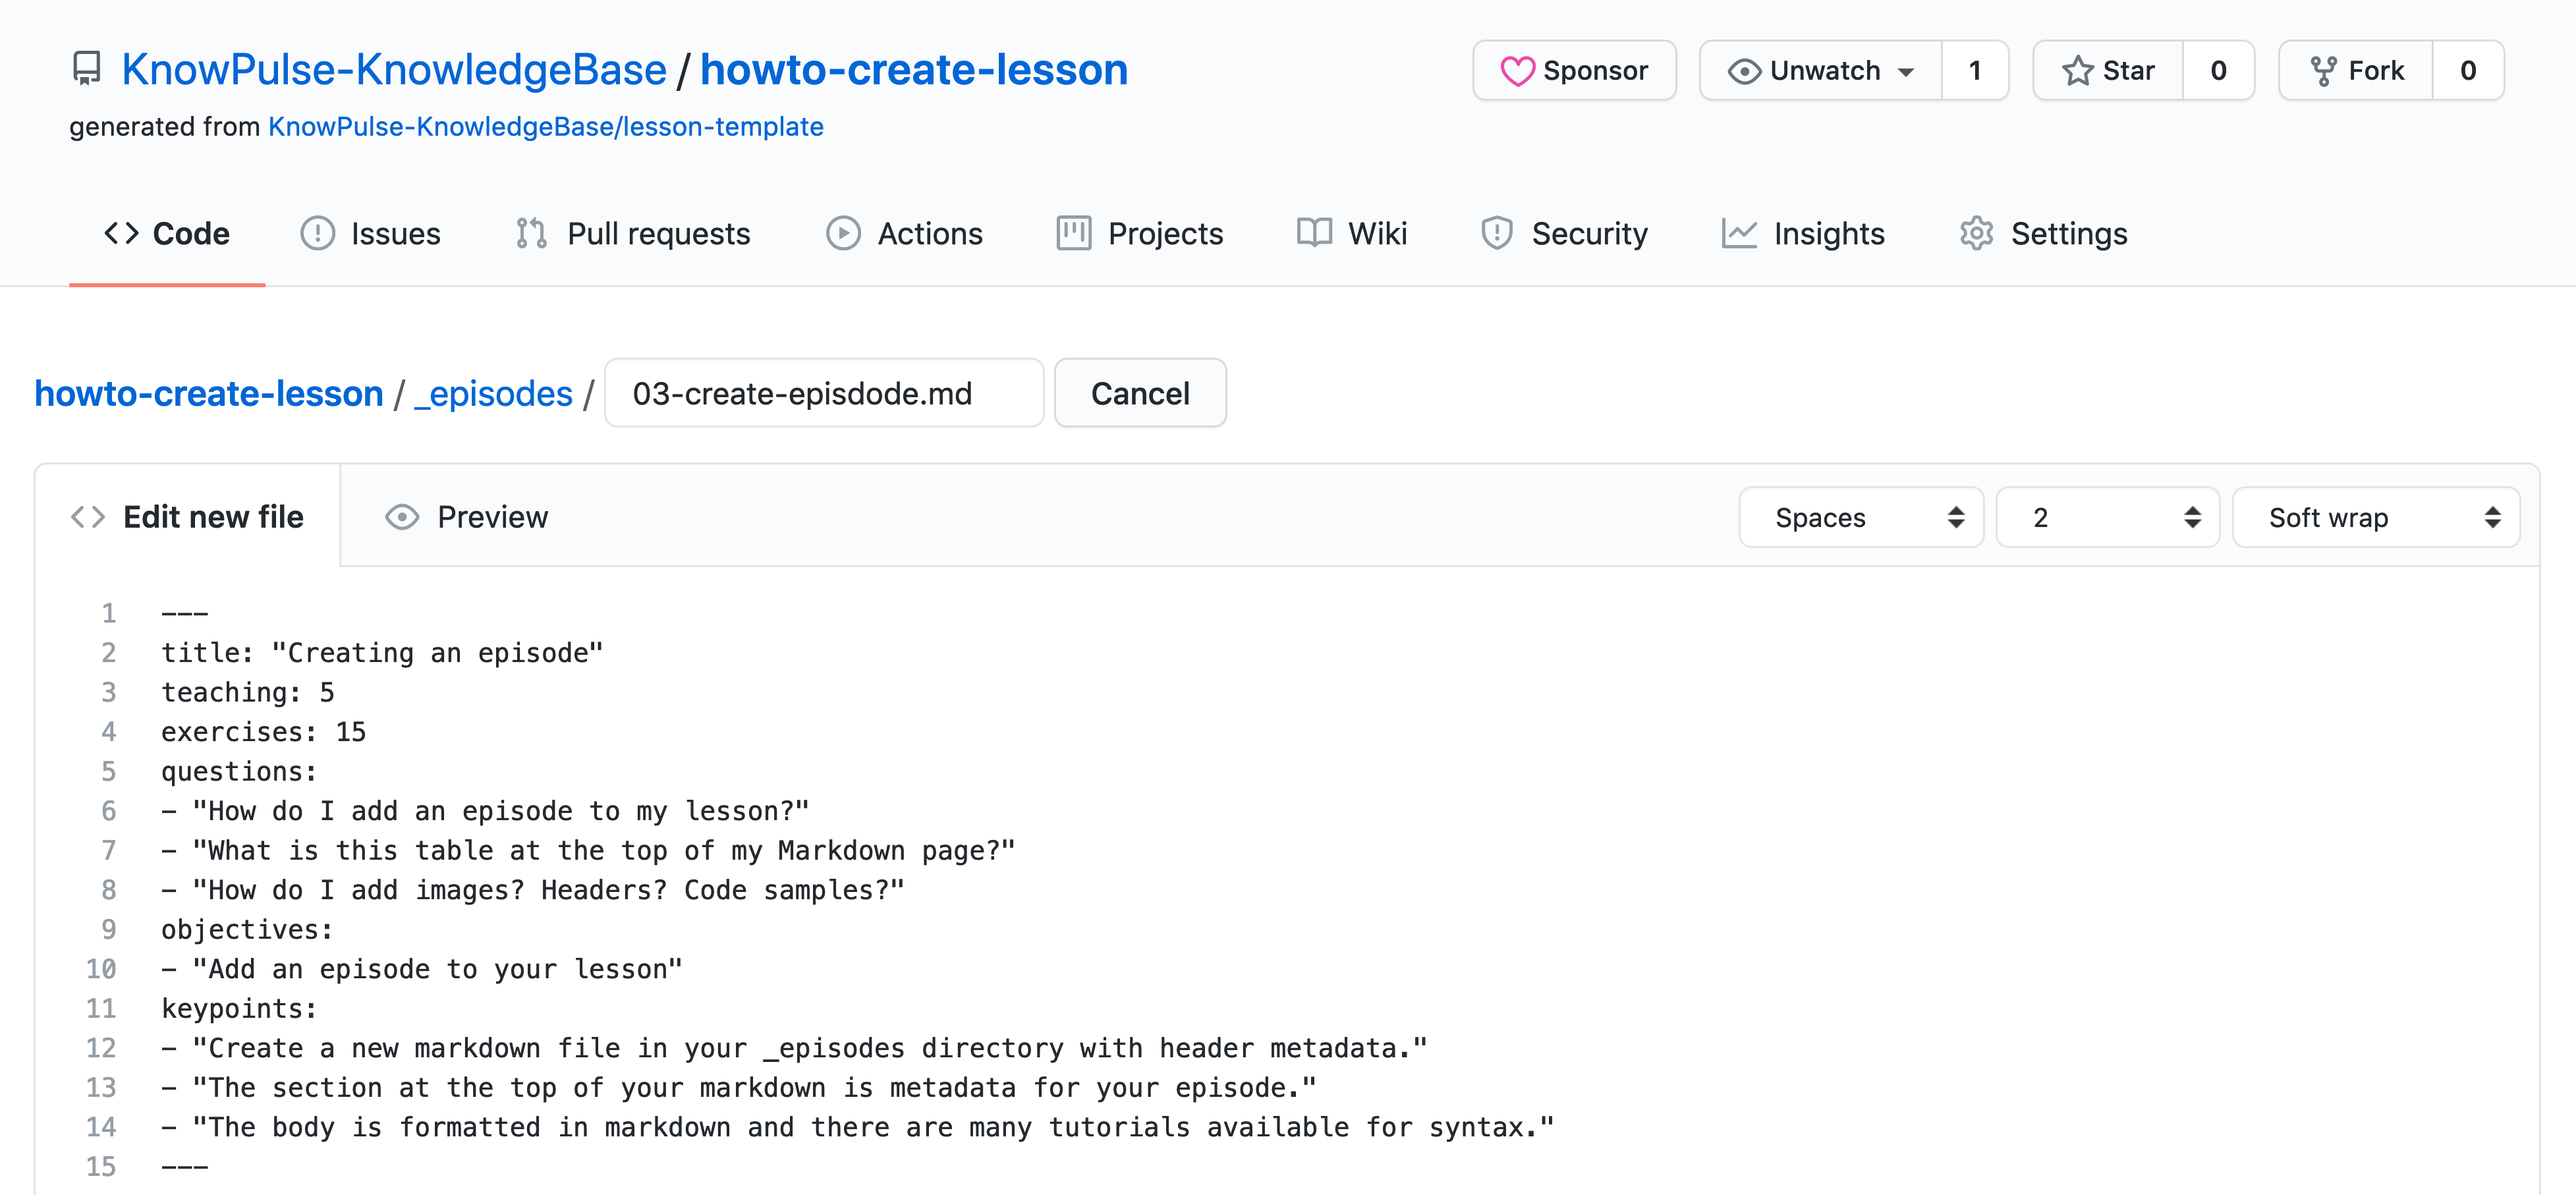
Within the --- there are a number of required metadata to fill out:
- title: This is the title of the episode. It will be used in the main schedule as well as at the top of your episode page.
- teaching: This is the number of minutes you think it would take to teach this episode to someone else.
- exercices: The number of minutes it might take researchers to complete any exercises in the episode.
- questions: The questions a user might have that this episode is supposed to answer. These are great for guiding your content!
- objectives: The point of the epsidode. What is it trying to accomplish?
- keypoints: Very breif, single sentence answers to the questions. Additionally can include any other key points you want the researcher to get from this episode.
For example, here is the metadata for this episode:
---
title: "Creating an episode"
teaching: 10
exercises: 20
questions:
- "How do I add an episode to my lesson?"
- "What is this table at the top of my Markdown page?"
- "How do I add images? Headers? Code samples?"
objectives:
- "Add an episode to your lesson"
keypoints:
- "Create a new markdown file in your _episodes directory with header metadata."
- "The section at the top of your markdown is metadata for your episode."
- "The body is formatted in markdown and there are many tutorials available for syntax."
---
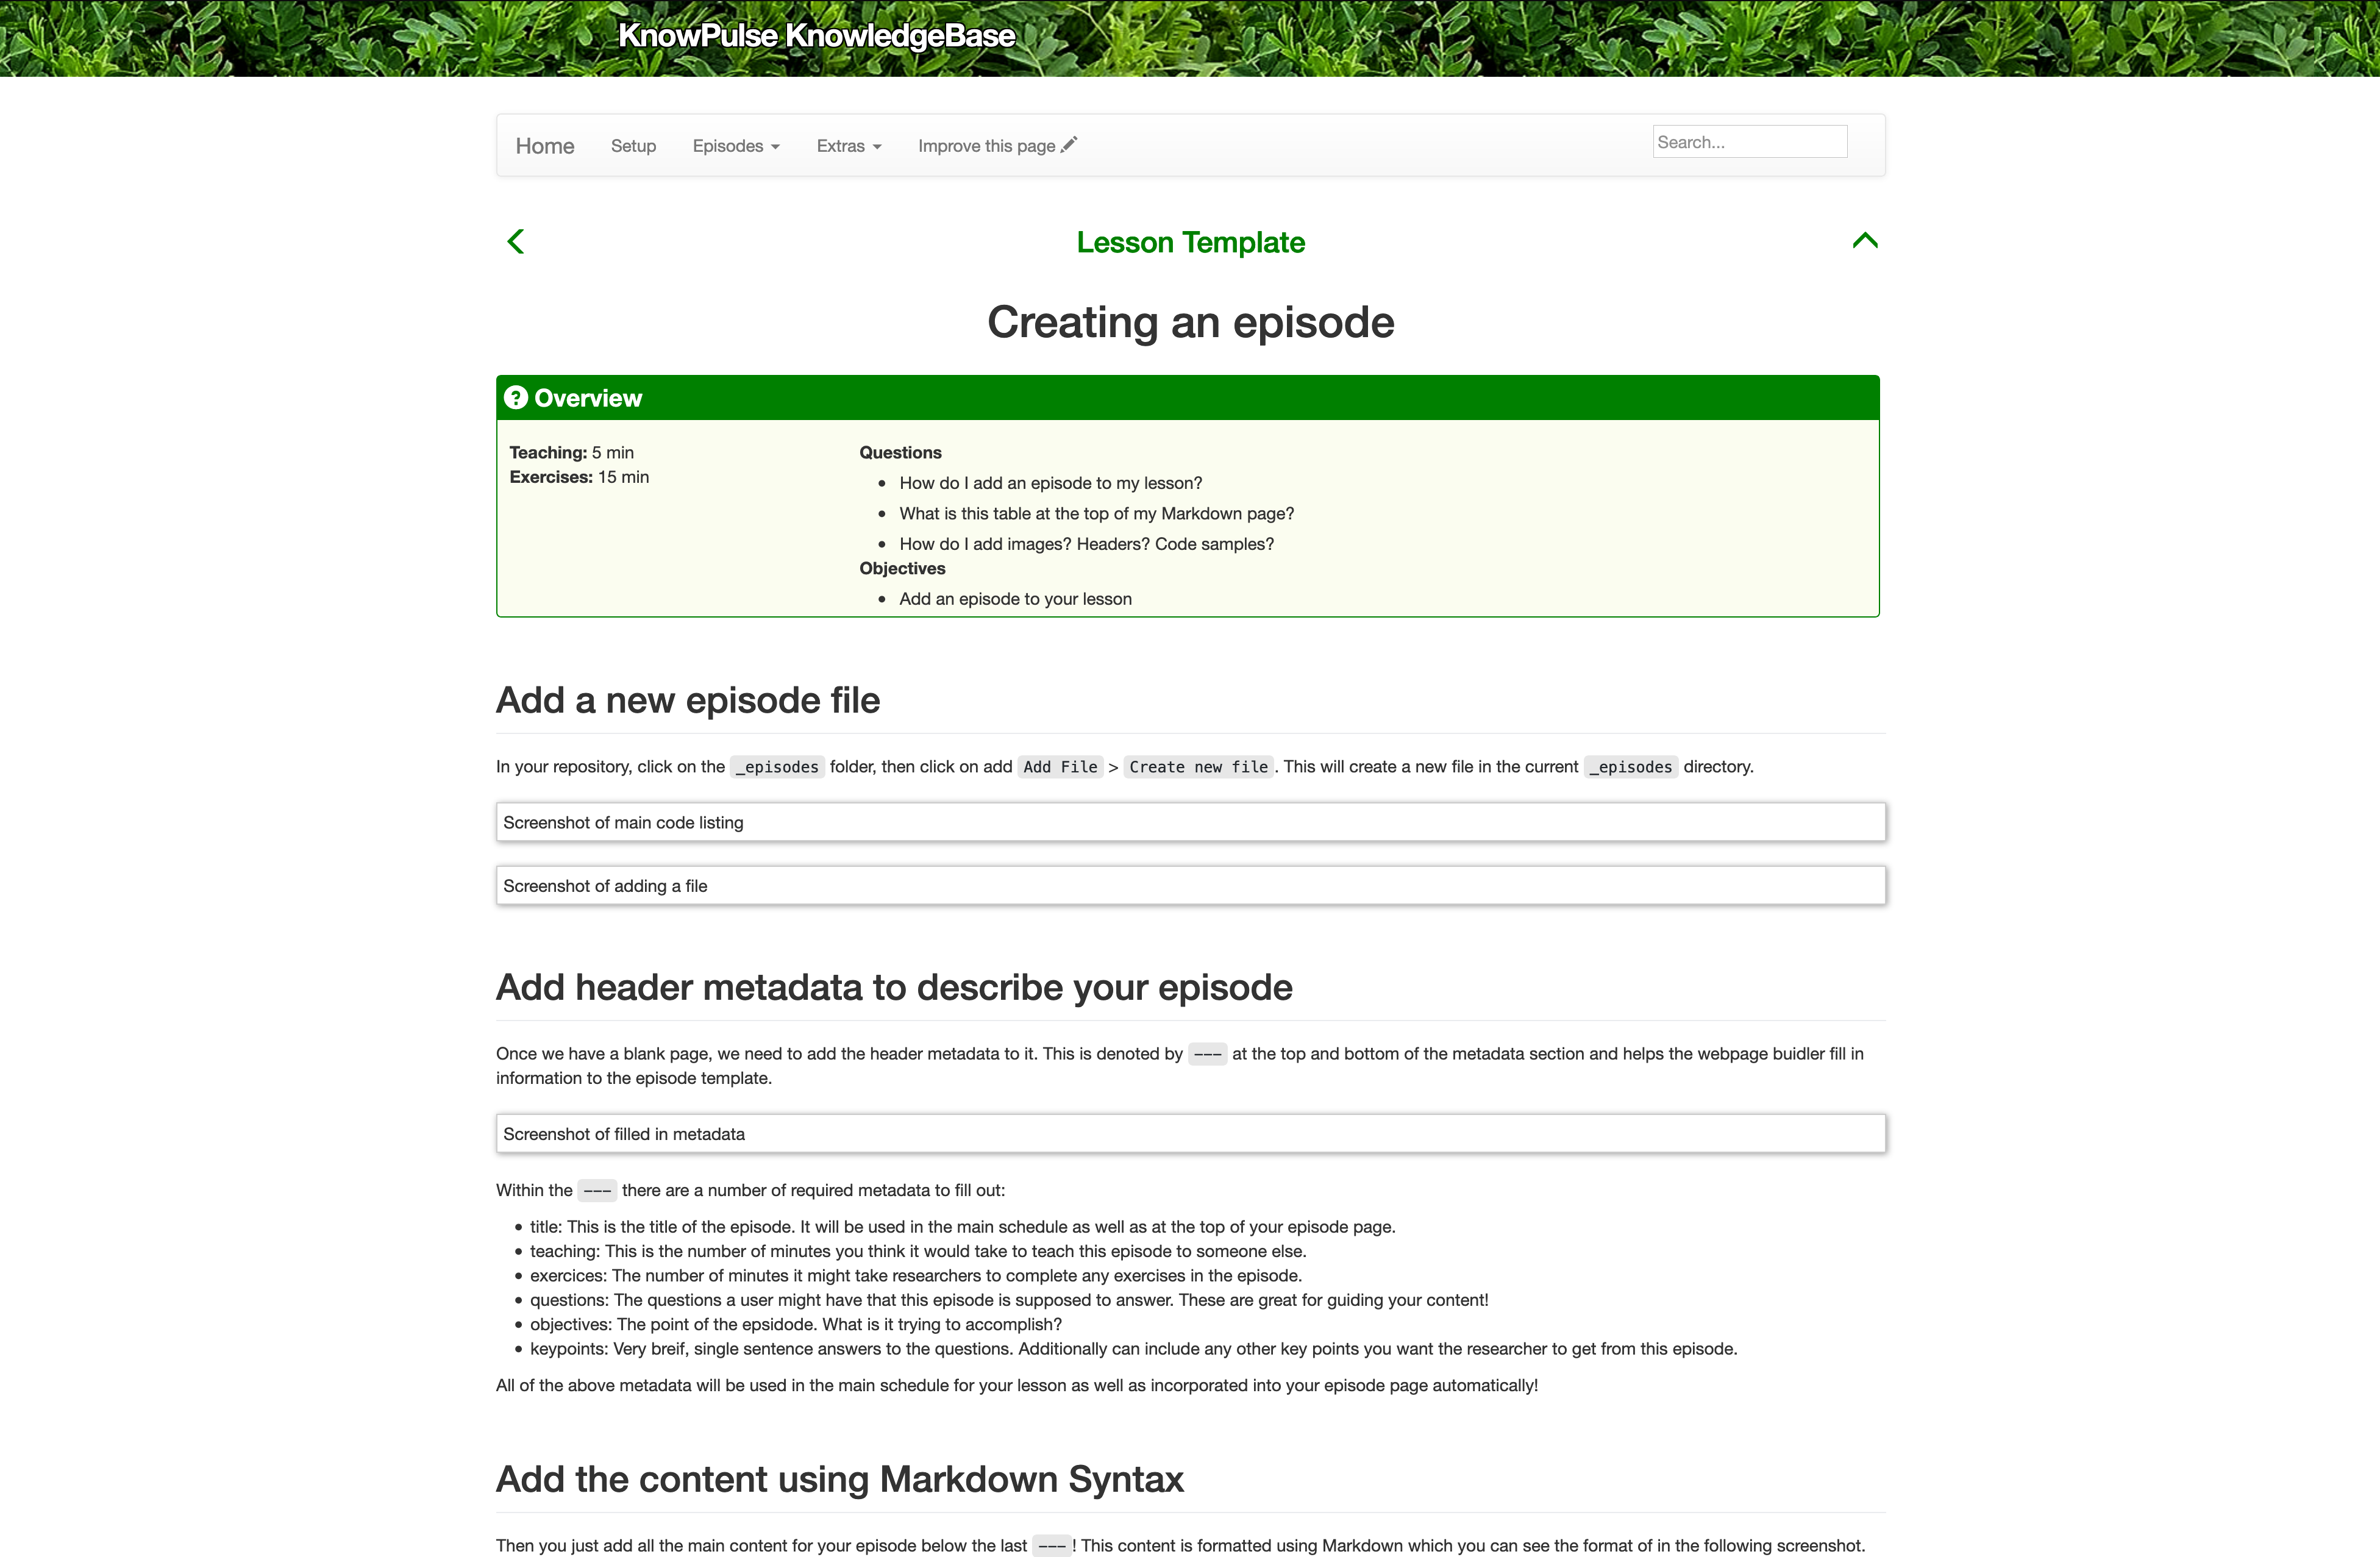
All of the above metadata will be used in the main schedule for your lesson as well as incorporated into your episode page automatically!
Add the content using Markdown Syntax
Then you just add all the main content for your episode below the last ---! This content is formatted using Markdown which you can see the format of in the following screenshot.
Additionally, here is a quick little primer:
Headers:
# This is an <h1> tag
## This is an <h2> tag
###### This is an <h6> tag
Emphasis:
*This text will be italic*
_This will also be italic_
**This text will be bold**
__This will also be bold__
_You **can** combine them_
Lists:
Unordered:
* Item 1
* Item 2
* Item 2a
* Item 2b
Ordered:
1. Item 1
1. Item 2
1. Item 3
1. Item 3a
1. Item 3b
Images:

Format: 
Links:
http://github.com - automatic!
[GitHub](http://github.com)
Blockquotes:
As Kanye West said:
> We're living the future so
> the present is our past.
Inline code:
I think you should use an
`<addr>` element here instead.
And additional resources:
Next, Save the content
The last step is to save the content and let the magic happen! To do this, scroll to the bottom of the page and click the “Commit” button at the bottom.
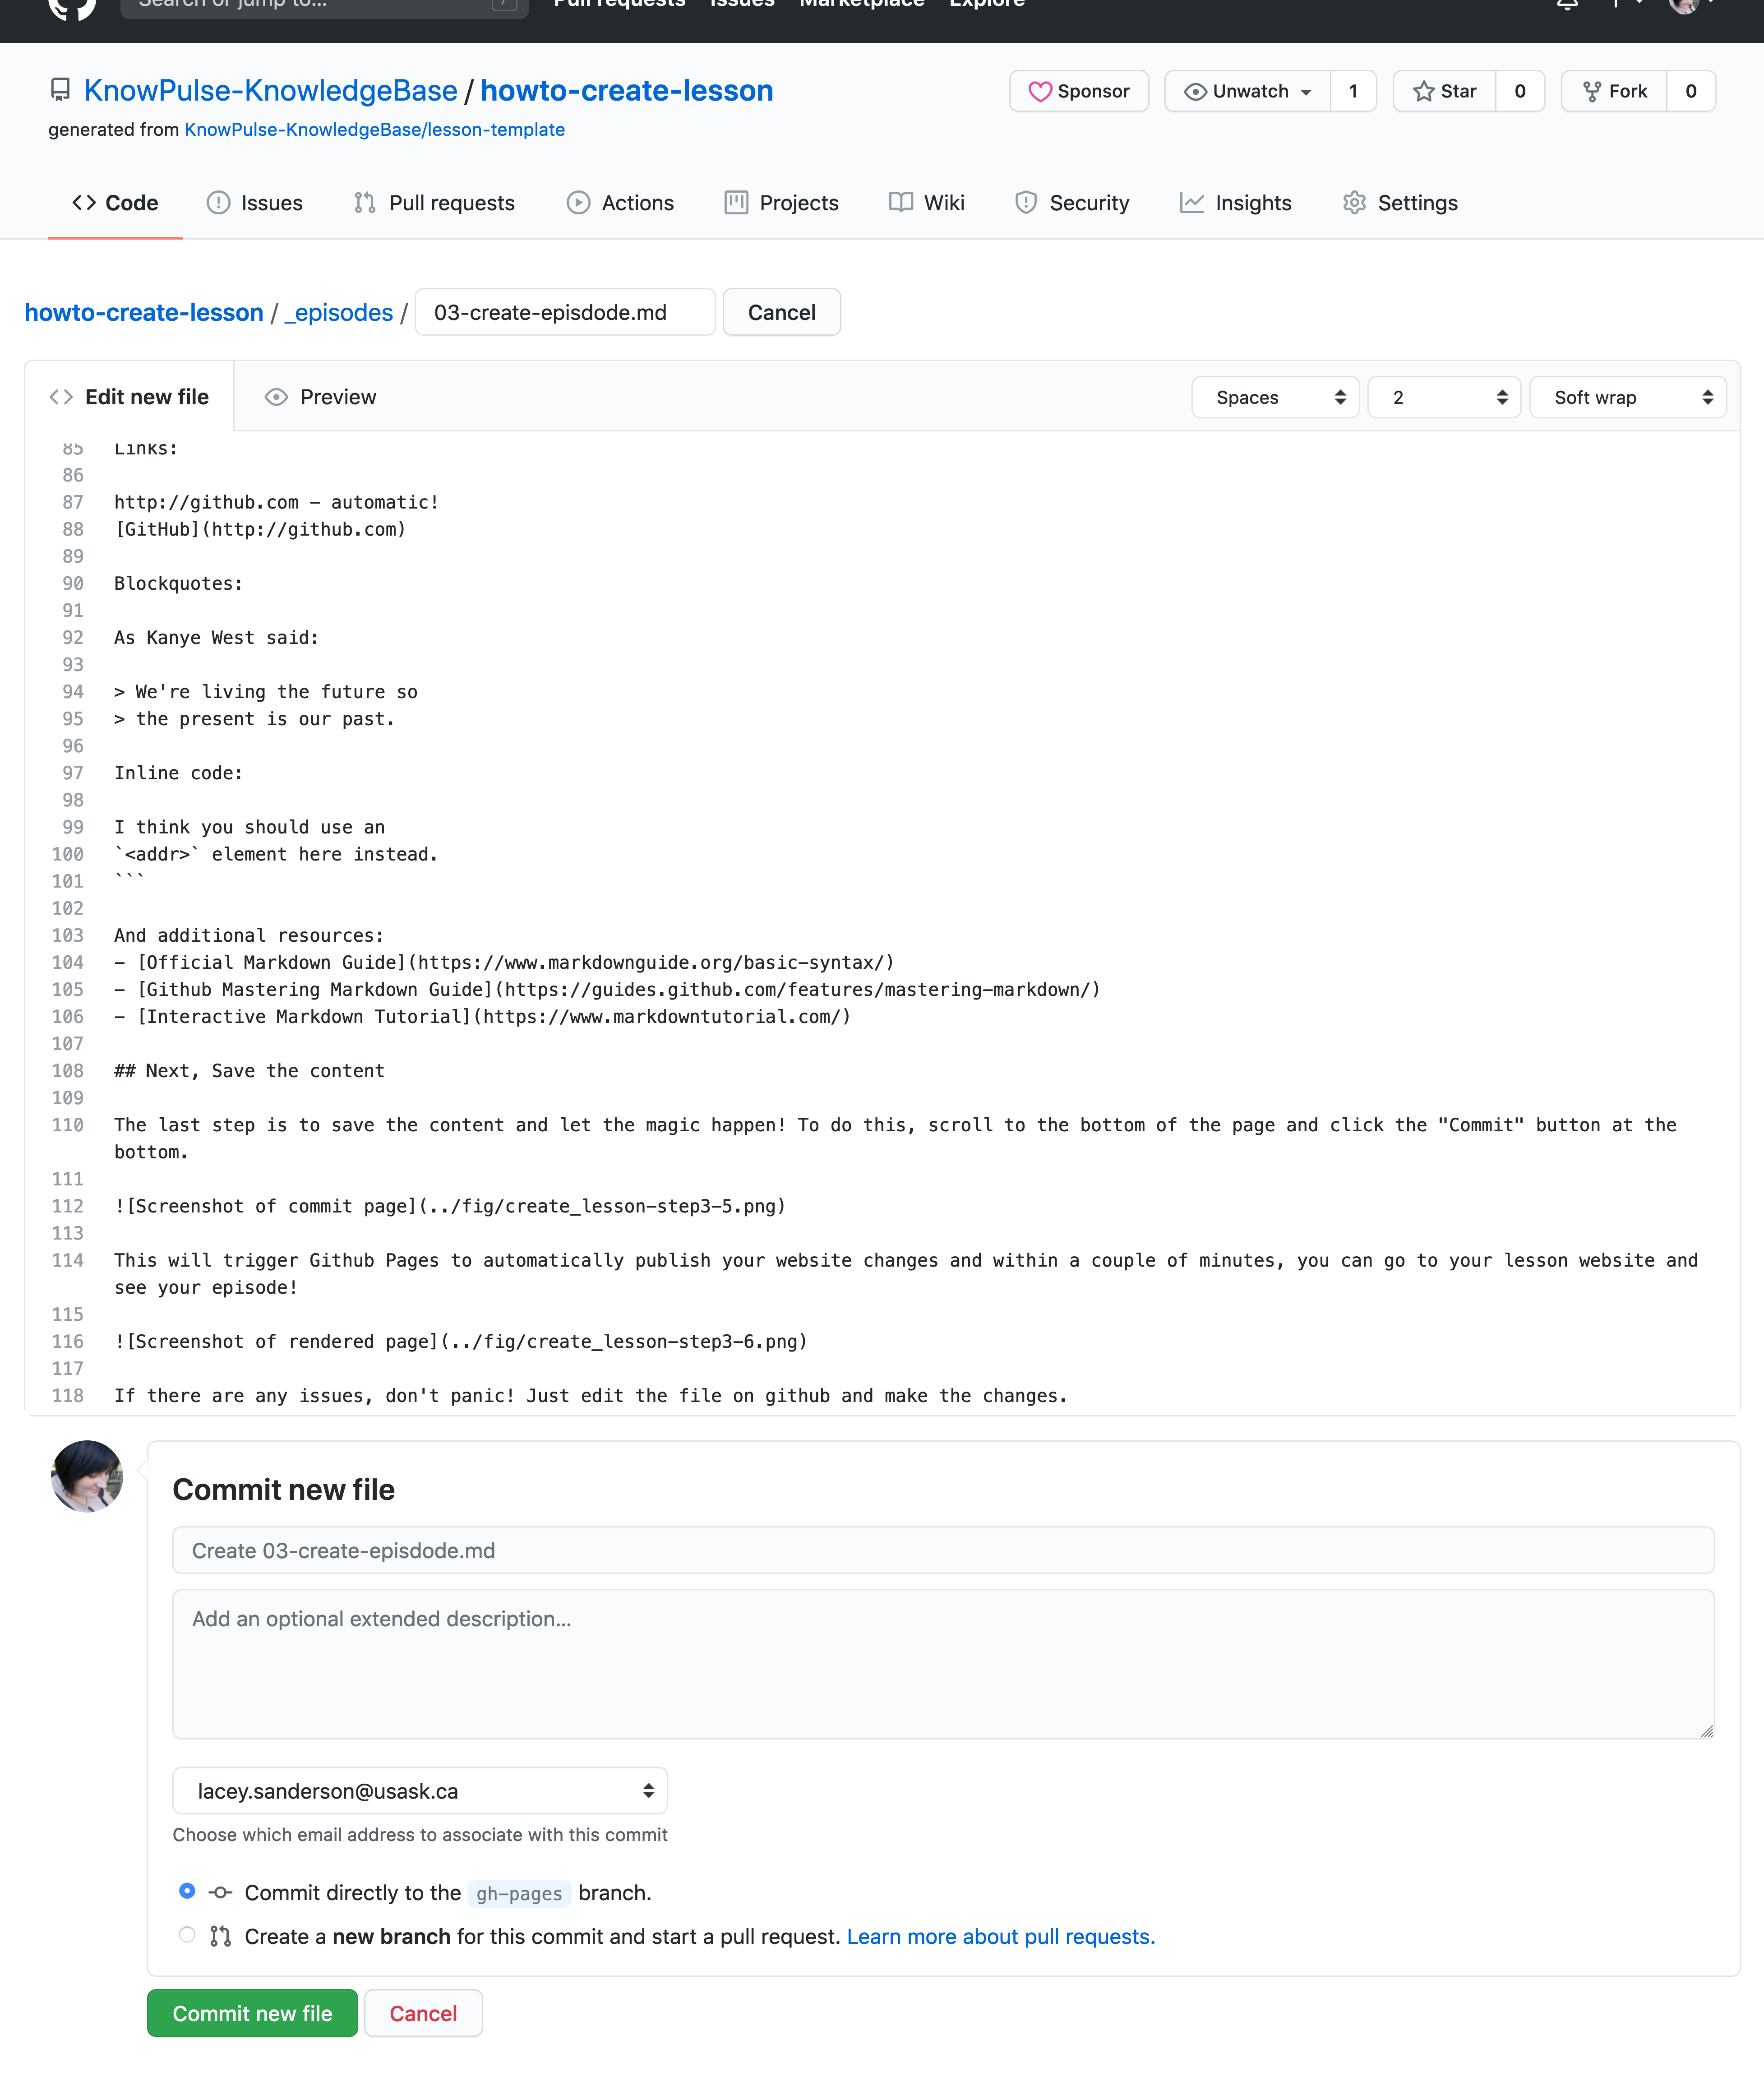
This will trigger Github Pages to automatically publish your website changes and within a couple of minutes, you can go to your lesson website and see your episode!
If there are any issues, don’t panic! Just edit the file on github and make the changes.
Finally, what about my images?
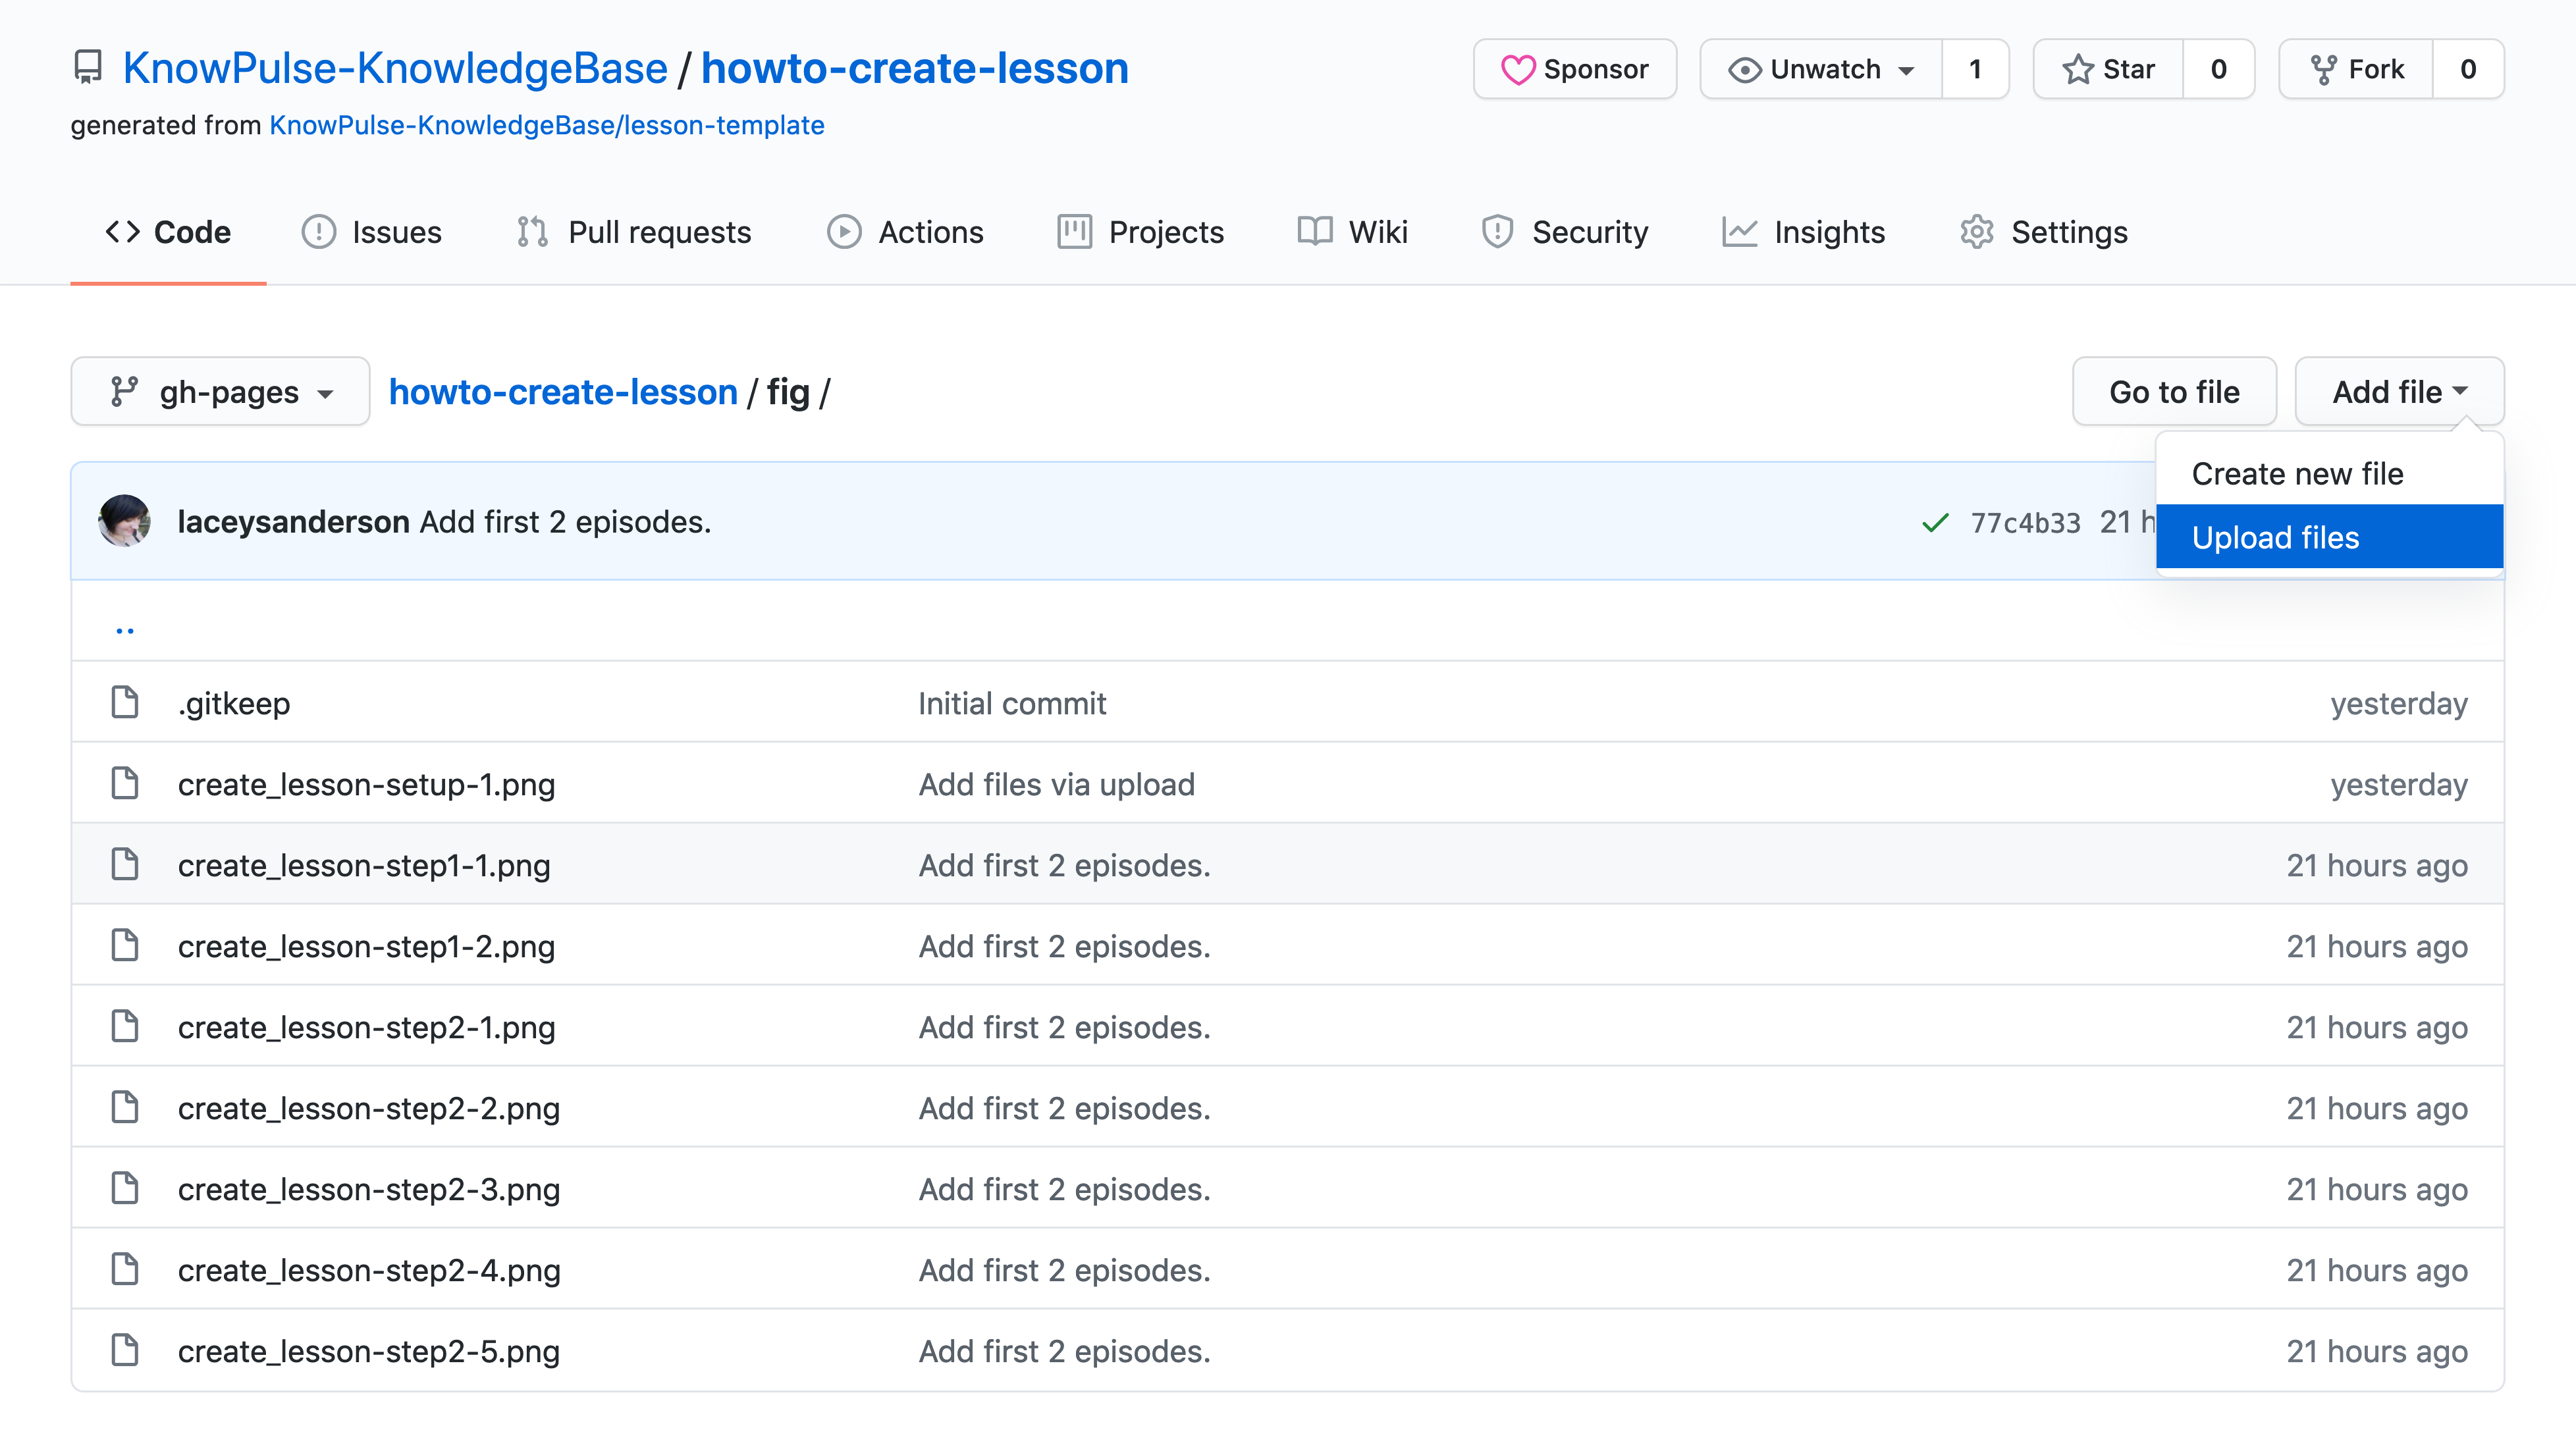
All images should be uploaded into the fig directory on your repository. First navigate back to the main page of your repository, click on the fig folder and then click Add file > Upload files.
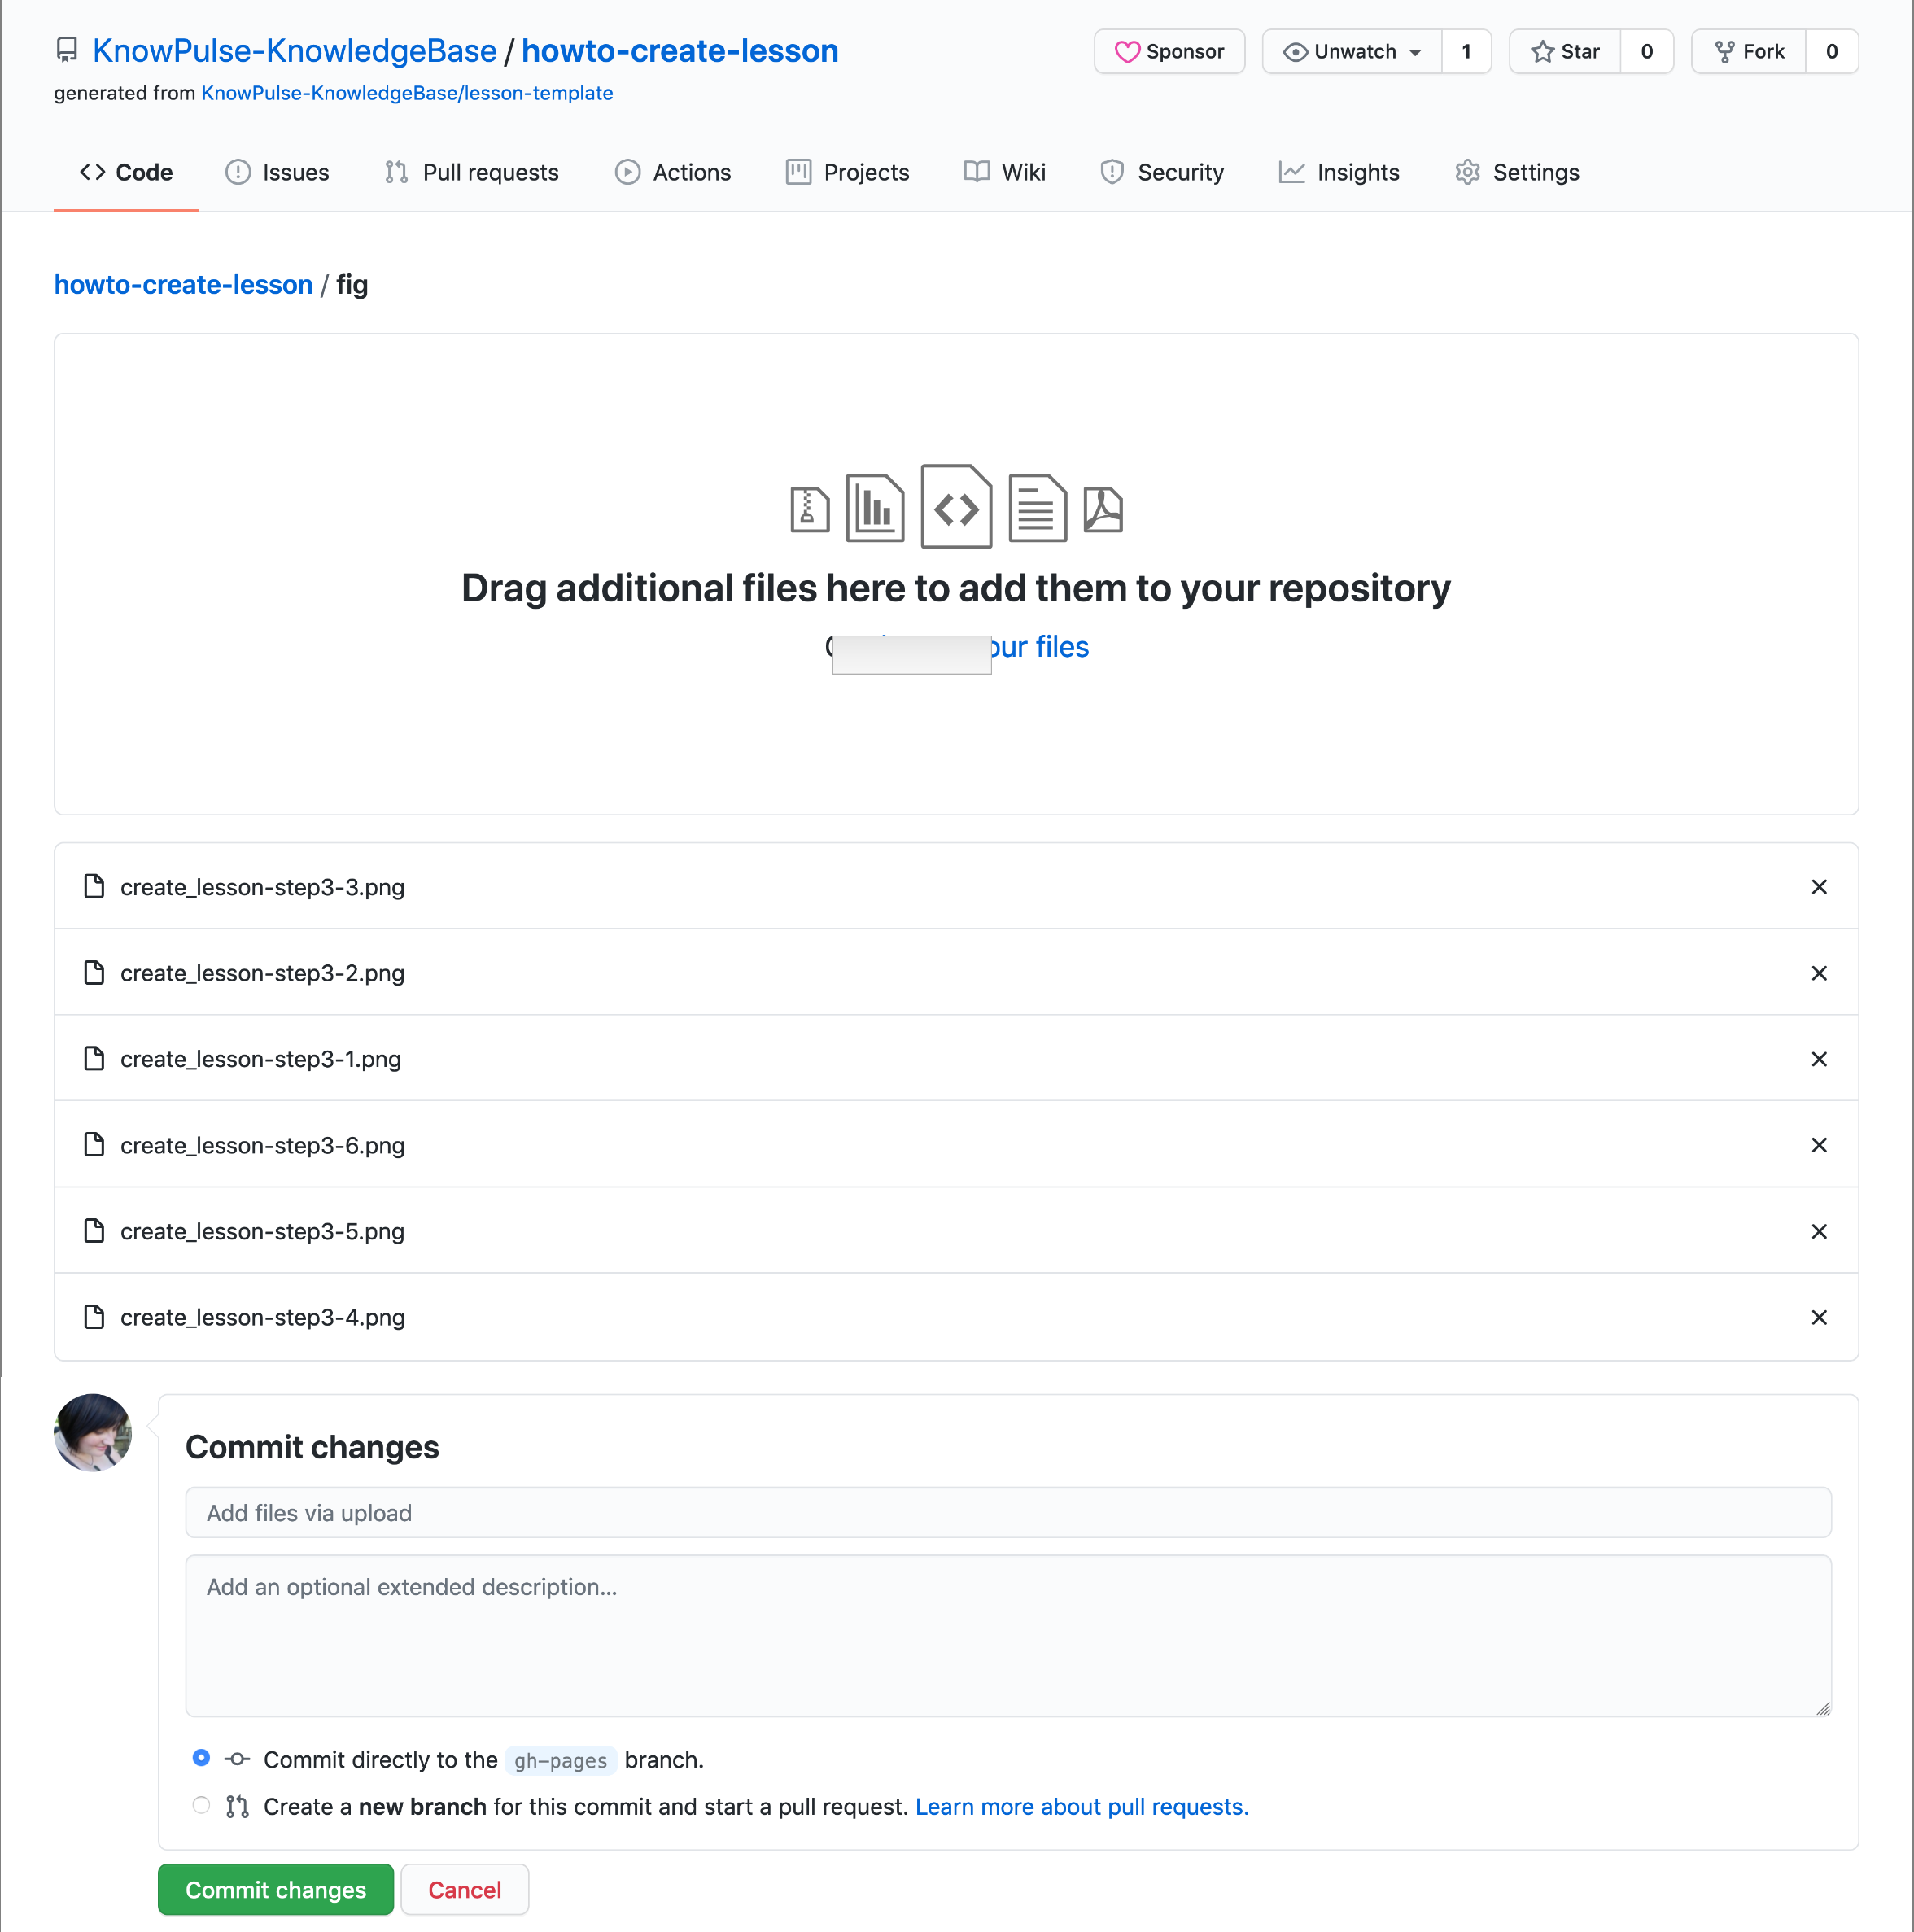
Next, drag all your images onto the indicated region and then click commit!
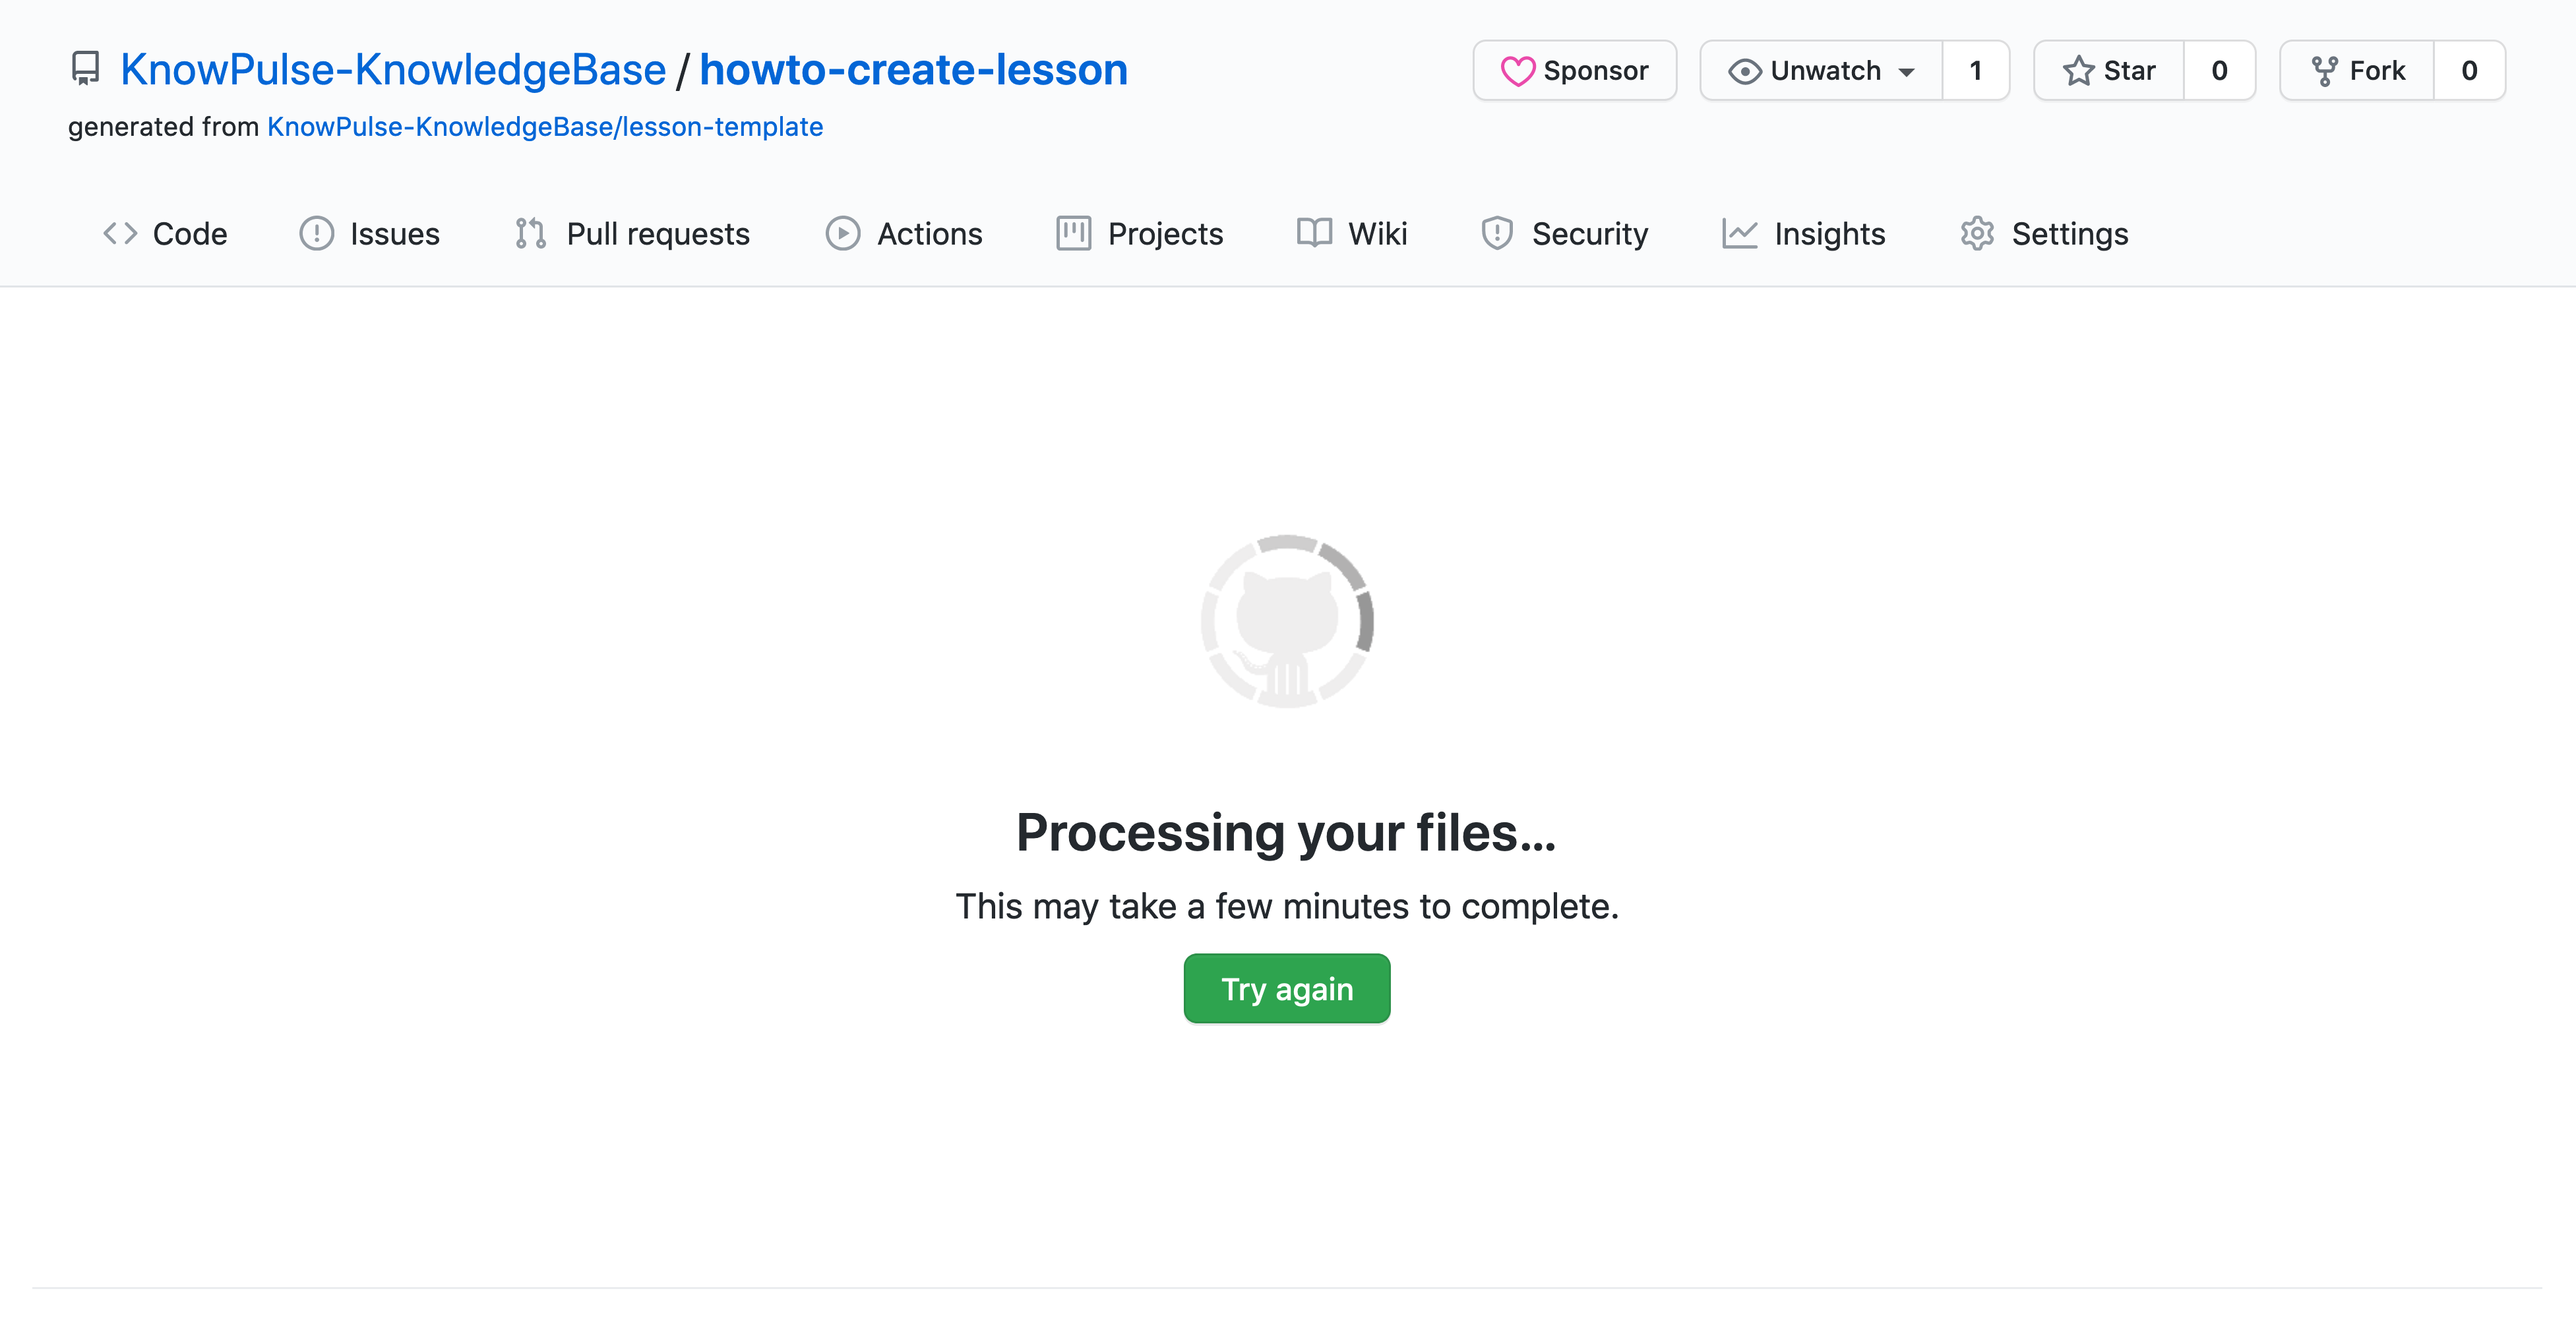
This will take a little time to process. Once it’s done it will trigger your website to be rebuilt and after a few minutes you can refresh the page and find the images there!
Key Points
Create a new markdown file in your _episodes directory with header metadata.
The section at the top of your markdown is metadata for your episode.
The body is formatted in markdown and there are many tutorials available for syntax.
The Setup and Reference sections
Overview
Teaching: 5 min
Exercises: 20 minQuestions
How to I provide setup instructions for researchers?
The Extras > Reference page is blank… how can I fix this?
Objectives
Complete the setup and reference sections of the lesson.
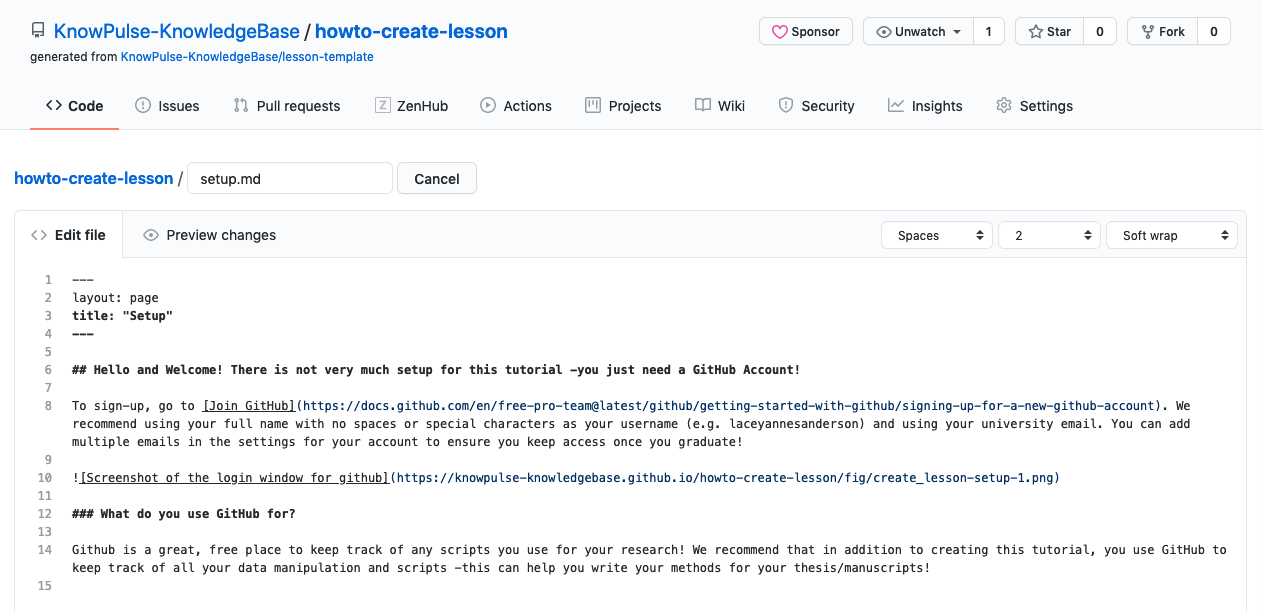
To provide setup instructions to researchers, just edit the setup.md page and add any content you want. I suggest including links to installation instructions for any software used.
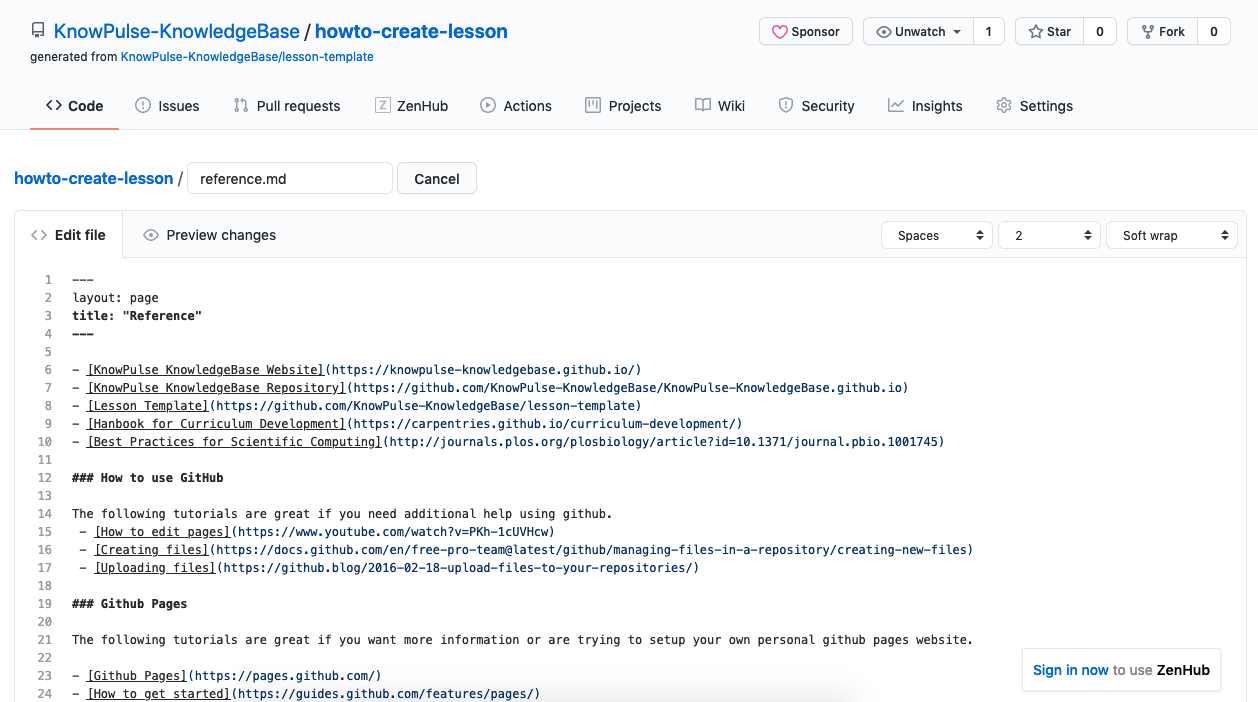
Follow the same instructions for editing the reference.md. This document should include links to any reference materials, tutorials, manuals, etc. It’s also a good place to highlight the most important commands and link to the most important tools.
Key Points
To provide setup instructions, add content to the setup.md
To provide reference information, add content to the reference.md
You should always complete these sections for a lesson.
Adding your lesson to the KnowPulse KnowledgeBase listing
Overview
Teaching: 10 min
Exercises: 10 minQuestions
How do I add my complete lesson to the KnowPulse KnowledgeBase?
Objectives
Add the lesson to the main listing of the KnowPulse KnowledgeBase.
Behind the KnowPulse KnowledgeBase listing
The KnowPulse KnowledgeBase is also a published using Github Pages! As such, you may notice it has a similar structure to your lesson repository. Since the full KnowledgeBase repository doesn’t serve lessons there is no _episode directory but rather there is a _posts directory with a similar function. Just as adding episode files automatically adds to your lesson schedule, adding posts to the KnowPulse KnowledgeBase repository automatically adds to the lesson listing! Next, I’ll walk you through that process in more detail.
Adding your lesson to the listing
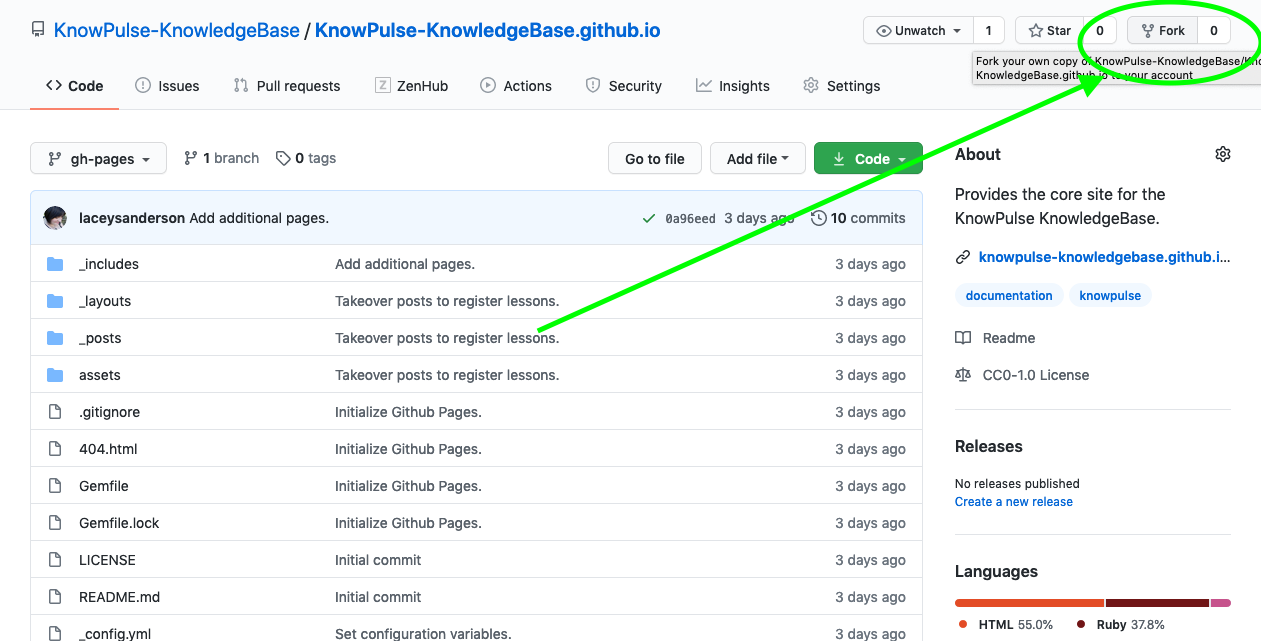
The first step is to create a copy of the main KnowPulse KnowledgeBase repository in your github space. This is called “Forking” a repository and is necessary to ensure you have the permissions you need to edit files. To fork the repository go to https://github.com/KnowPulse-KnowledgeBase/KnowPulse-KnowledgeBase.github.io and click on the “Fork” button at the top of the repository. This will take a minute or so and your see a progress icon shown below indicating that it’s working.
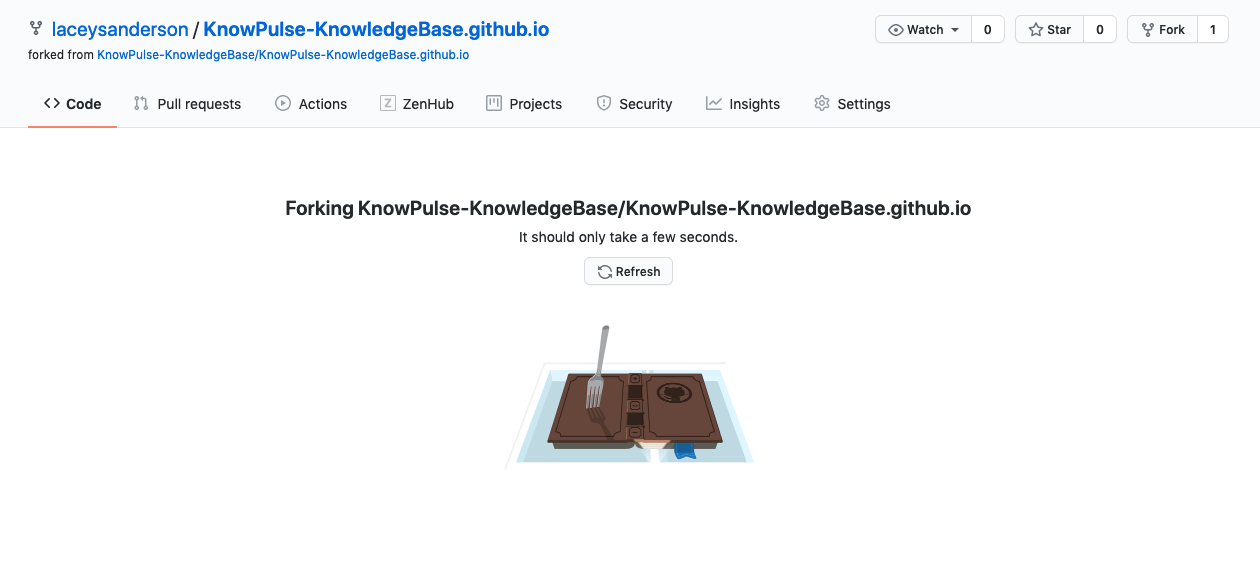
Once Github is done creating the fork, it should redirect you to your new repository. It should be [yourgithubname]/KnowPulse-KnowledgeBase.github.io to indicate that it’s your copy of the main KnowPulse-KnowledgeBase/KnowPulse-KnowledgeBase.github.io repository. All editing and adding of files should be completed here.
Create a new file in _posts for your lesson
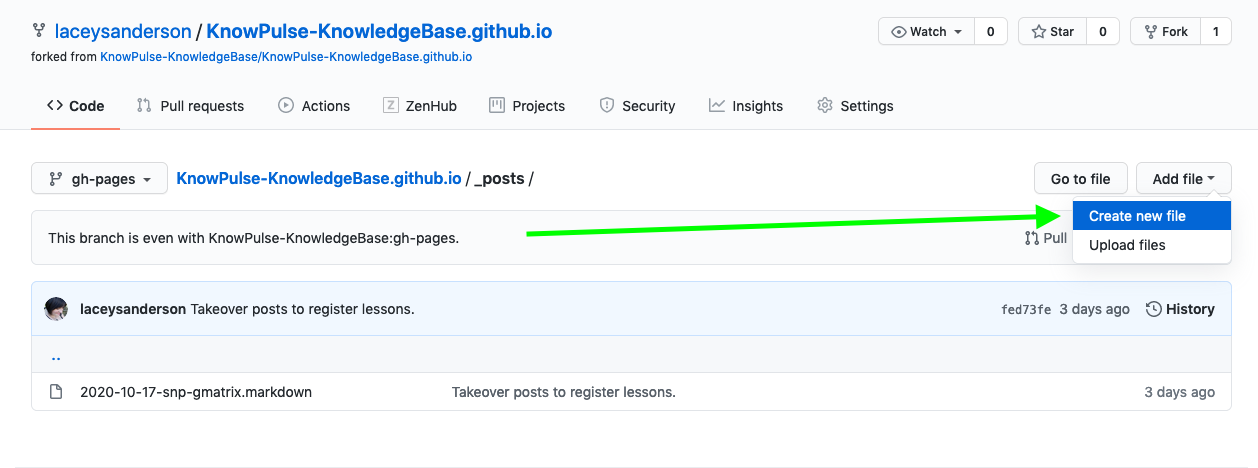
The next step is to create a new file in _posts for your lesson. To do this, click on the word _posts in your copy of the repository. Then click Add file > Create File at the top to create a new file in the current directory (i.e. _posts).
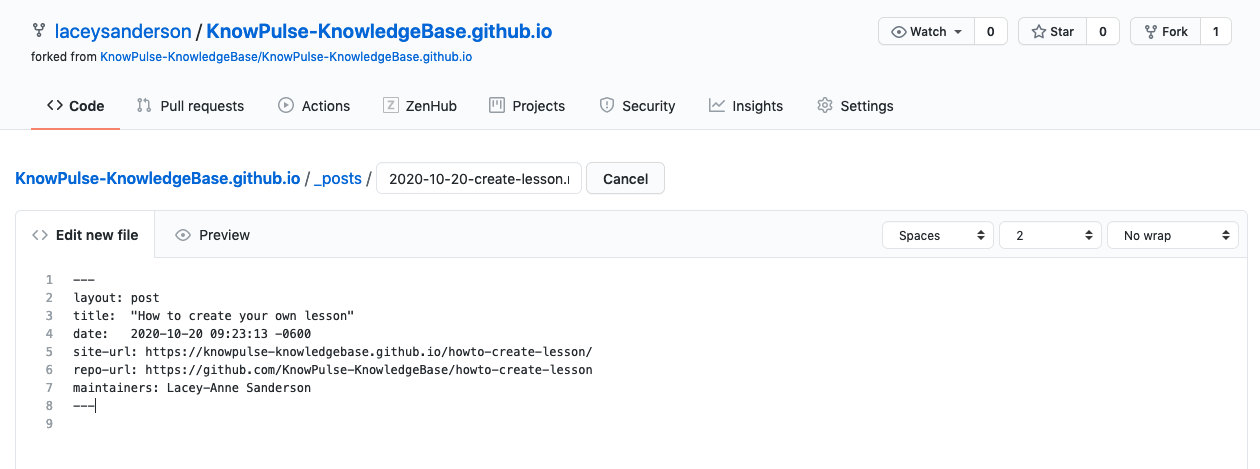
This file should be named with the current date and then the short name for your lesson (i.e. the name of your lesson repository). For example, the name of the file for this lesson is 2020-10-20-create-lesson.md since it was added to the KnowPulse KnowledgeBase listing on October 20th, 2020 and the lesson short name is create_lesson.
Describe your lesson to the KnowledgeBase
Notice that this is a markdown file and has the same header metadata you are used to seeing in your lesson. Thus to tell the KnowPulse KnowledgeBase you simply need to fill in header metadata. To do this, copy the following template into your new file and update the metadata to match your lesson.
---
layout: post
title:  "How to create your own lesson"
date:   2020-10-20 09:23:13 -0600
site-url: https://knowpulse-knowledgebase.github.io/howto-create-lesson/
repo-url: https://github.com/KnowPulse-KnowledgeBase/lesson-template
maintainers: Lacey-Anne Sanderson
---
Make sure the maintainer is changed to your name (it can also include anyone else who is willing to help) and that the date matches the current date as provided in the name of your file. The site-url should be the full web address of your published lesson website and the repo-url should be either blank or point to a separate github repository containing example code for your lesson. The title should be the full question your lesson answers.
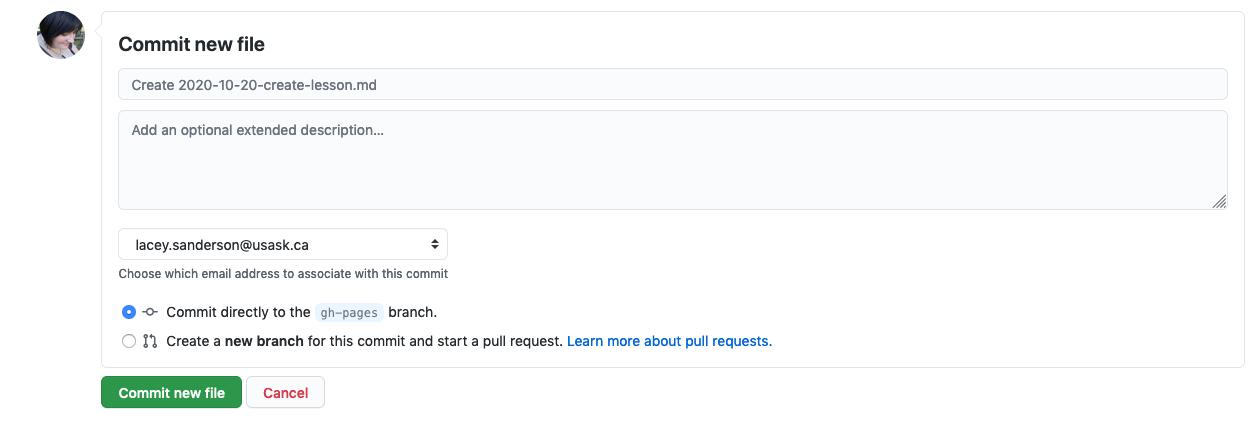
Then save the file to your copy of the KnowledgeBase by committing them!
Finally, add a request to the official KnowledgeBase repository
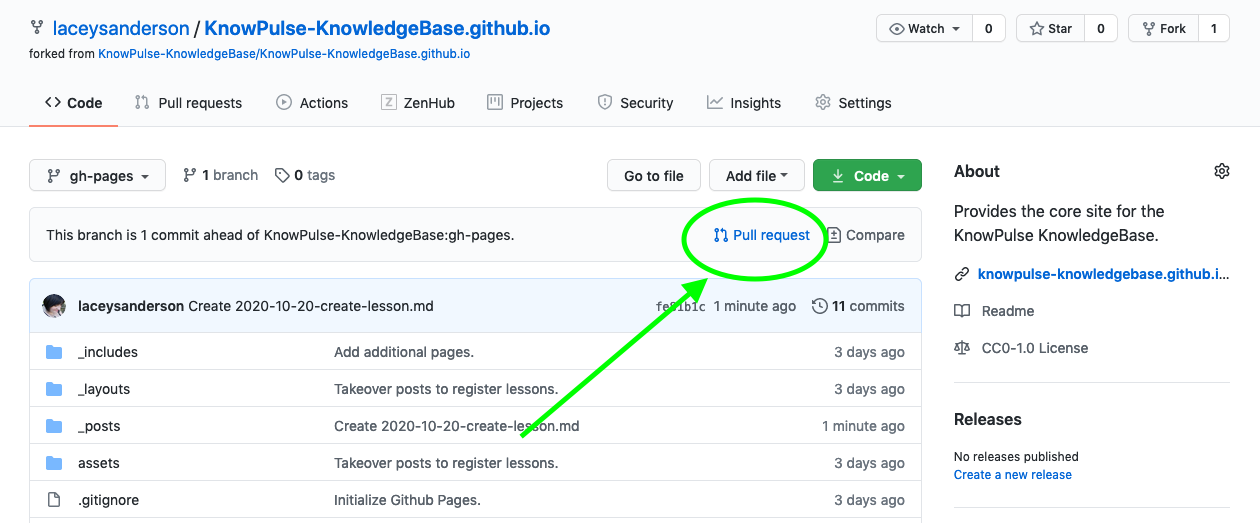
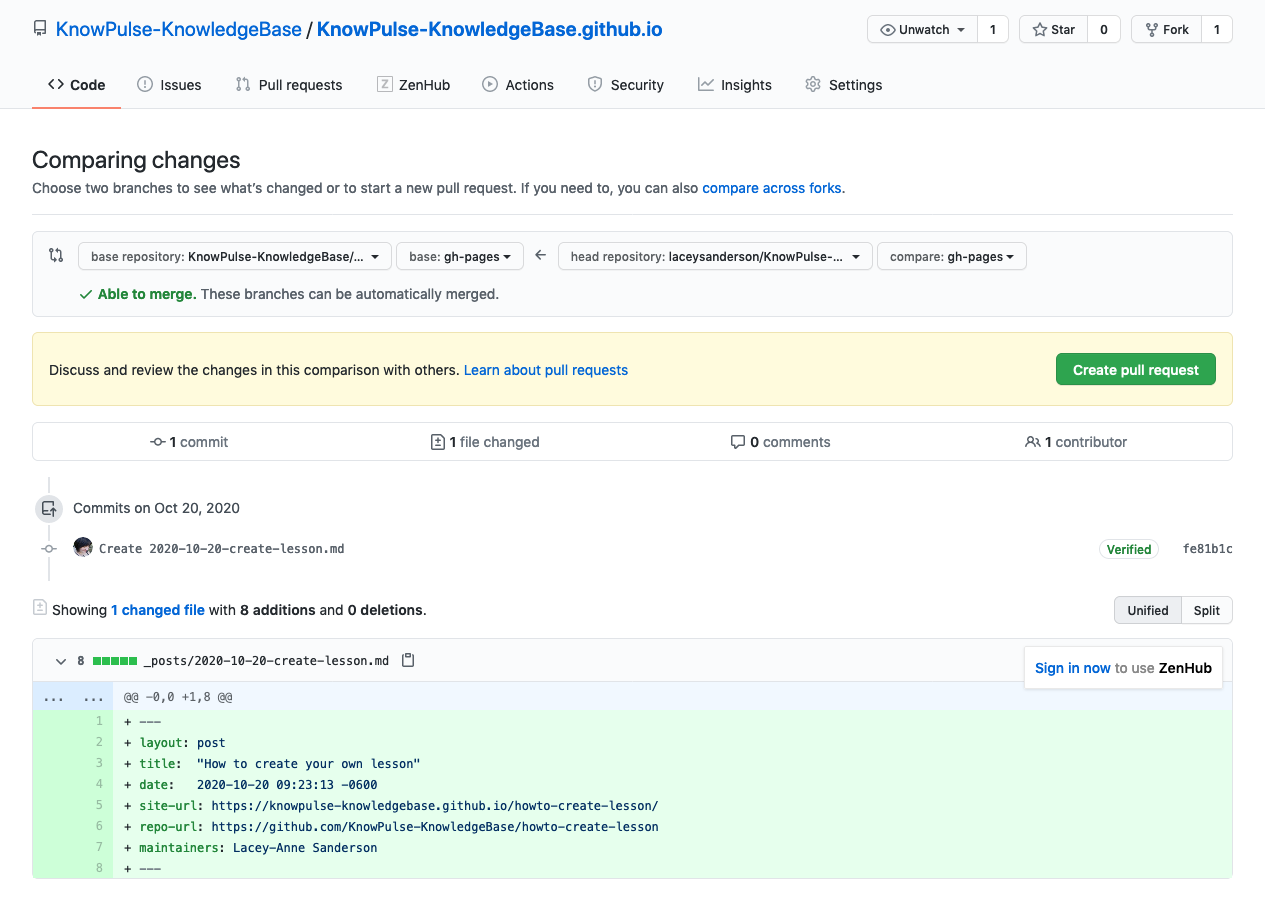
Adding a request is done by making a Pull Request on the main KnowPulse KnowledgeBase repository for your changes to be merged. You can think of this as a more automated form of walking down the hall to tell me you have a lesson and the details are _____. By clicking on the pull request link shown in the following screenshot on the main page of your personal copy of the KnowPulse KnowledgeBase, you are creating that request.
The first thing it does is show you the changes you made to your copy. This should simply be the addition of a file to the _post directory with imformation about your lesson, as shown below.
Once you confirm that the changes are correct and click create pull request, it brings you to a page with a box to enter text in. You can use this as your opprotunity to convey anything you would say to me after walking down the hall. At a minimum it would be great to re-state your lesson, why it’s helpful and link to the lesson repostory/website!
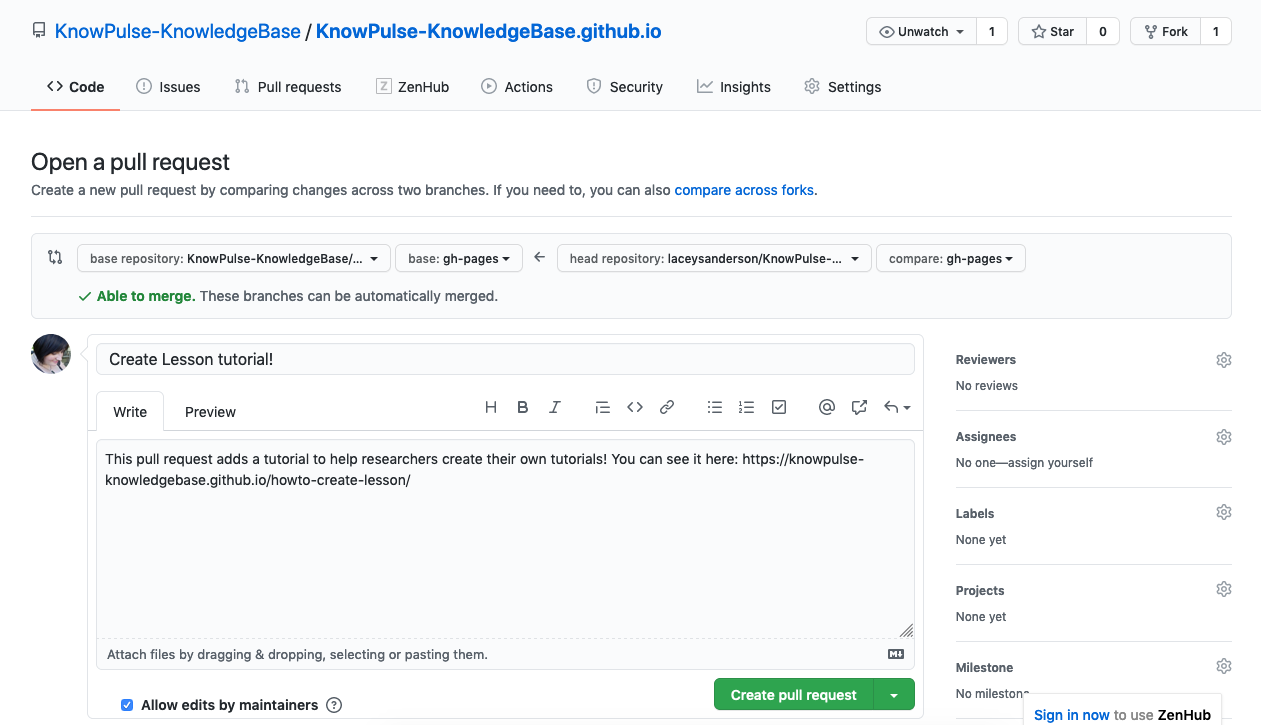
Then you click the Create Pull Request button one more time and the request is sent to me! This method makes it really easy for me to merge in your changes as, once approved, I can simply click a button and the KnowPulse KnowledgeBase will automatically be updated with your lesson added to the listing!
Thank you So Much for contributing! At this point your lesson is available to all researchers!
Key Points
Create a pull request on the KnowPulse-KnowledgeBase.github.io repository.
Add a post with metadata only to have it show up in the list automatically.